
This year, I visited Yosemite National Park twice — once in the fall while camping at Camp 4, and again in the winter when I stayed in a heated tent at Camp Curry (Curry Village). Both trips were incredible, but they felt like completely different experiences.
Camping in Yosemite during the fall and winter is honestly underrated. Fewer crowds, quieter mornings, and that soft, glowing light in Yosemite Valley made these trips some of my favorites I’ve ever taken here.
Photos: El Capitan at night with climbers, Sunset in Cook Meadow (oak tree), Tunnel View during the winter


Yosemite Valley Camping Guide (Overview)
- Best time to visit: Fall (October) and winter for fewer crowds and incredible light
- Where to stay: Camp 4 for budget camping, Camp Curry for heated tents, or valley lodges
- What to do: Photography, short hikes, biking the valley, sunrise & sunset viewpoints
- Best hikes: Lower Yosemite Falls, Bridalveil Fall, Sentinel Dome, Artist Point, Taft Point
- Skip or plan carefully: Half Dome, Mist Trail, Upper Yosemite Falls (crowded + seasonal)
- Getting around: Free Yosemite Valley shuttle, biking, or limited driving
- How long to stay: 3–4 days for highlights, 5 days ideal for photography & slow travel
Camping in Yosemite Valley
P.S. This post contains affiliate links. If you use my links to make a purchase, I’ll get a small commission at no extra cost to you. Thanks for your support!
Why I Loved Visiting Yosemite in the Fall and Winter
Fall Camping in Yosemite (Mid–Late October)
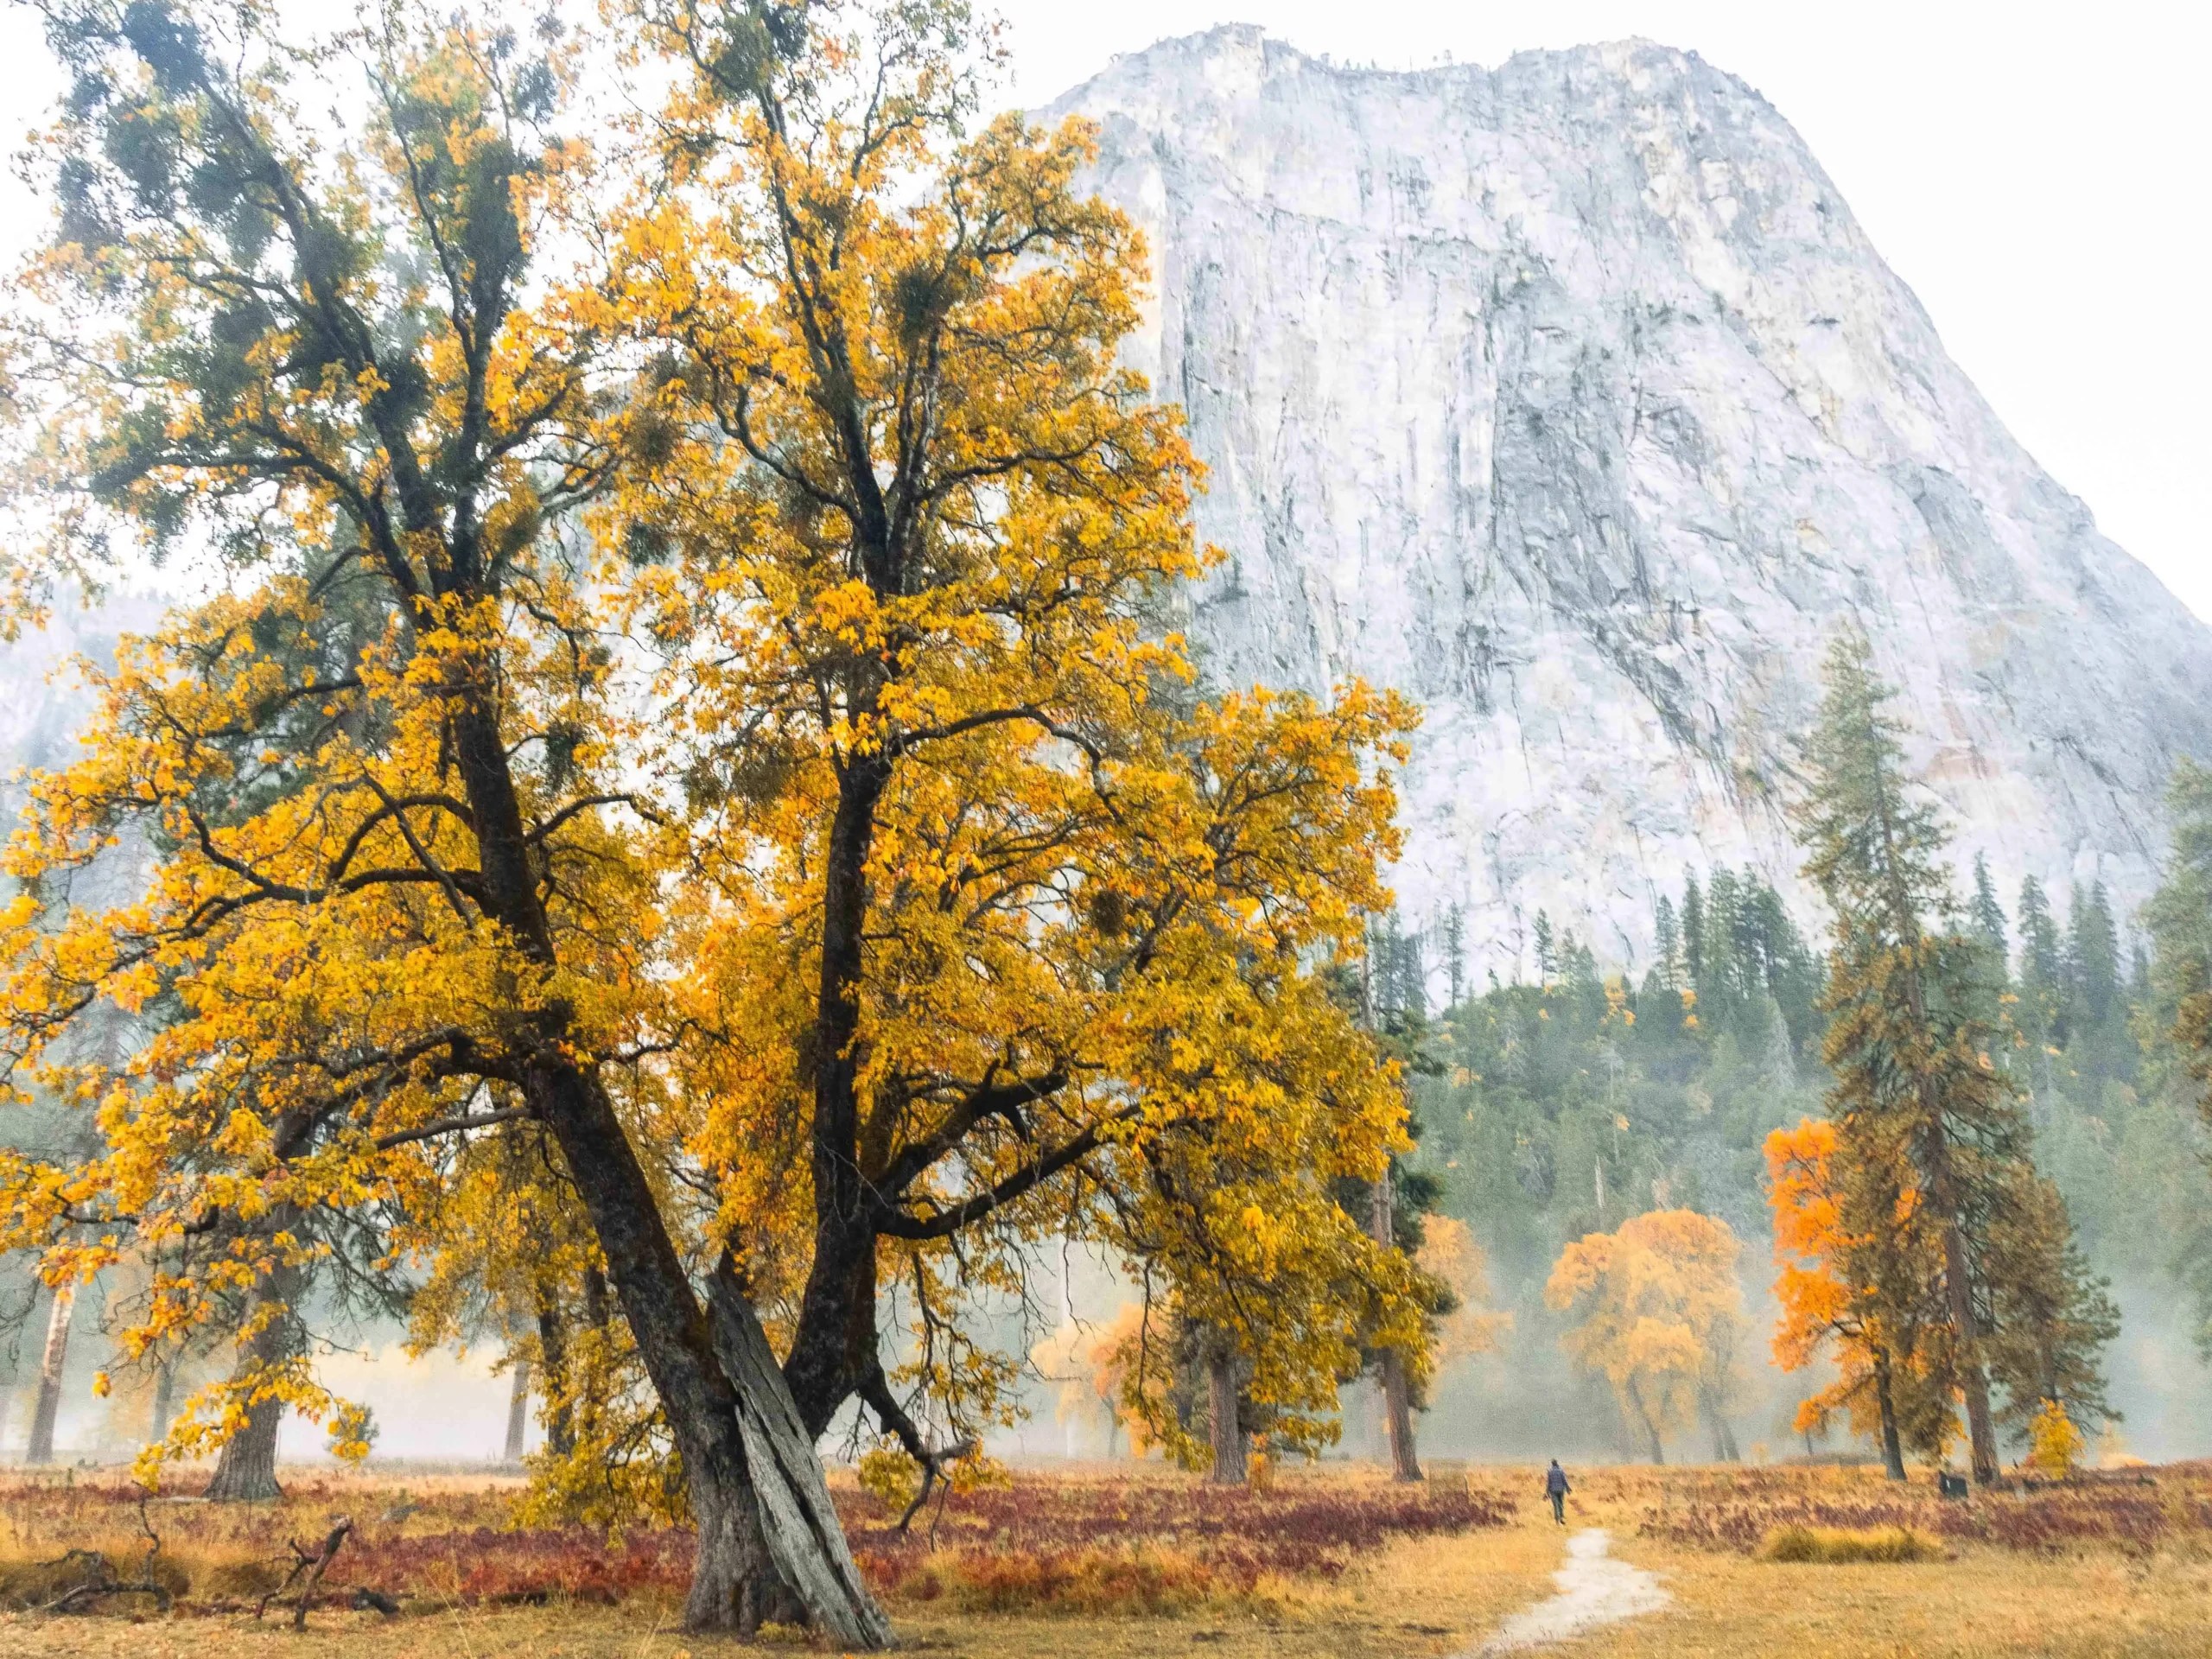
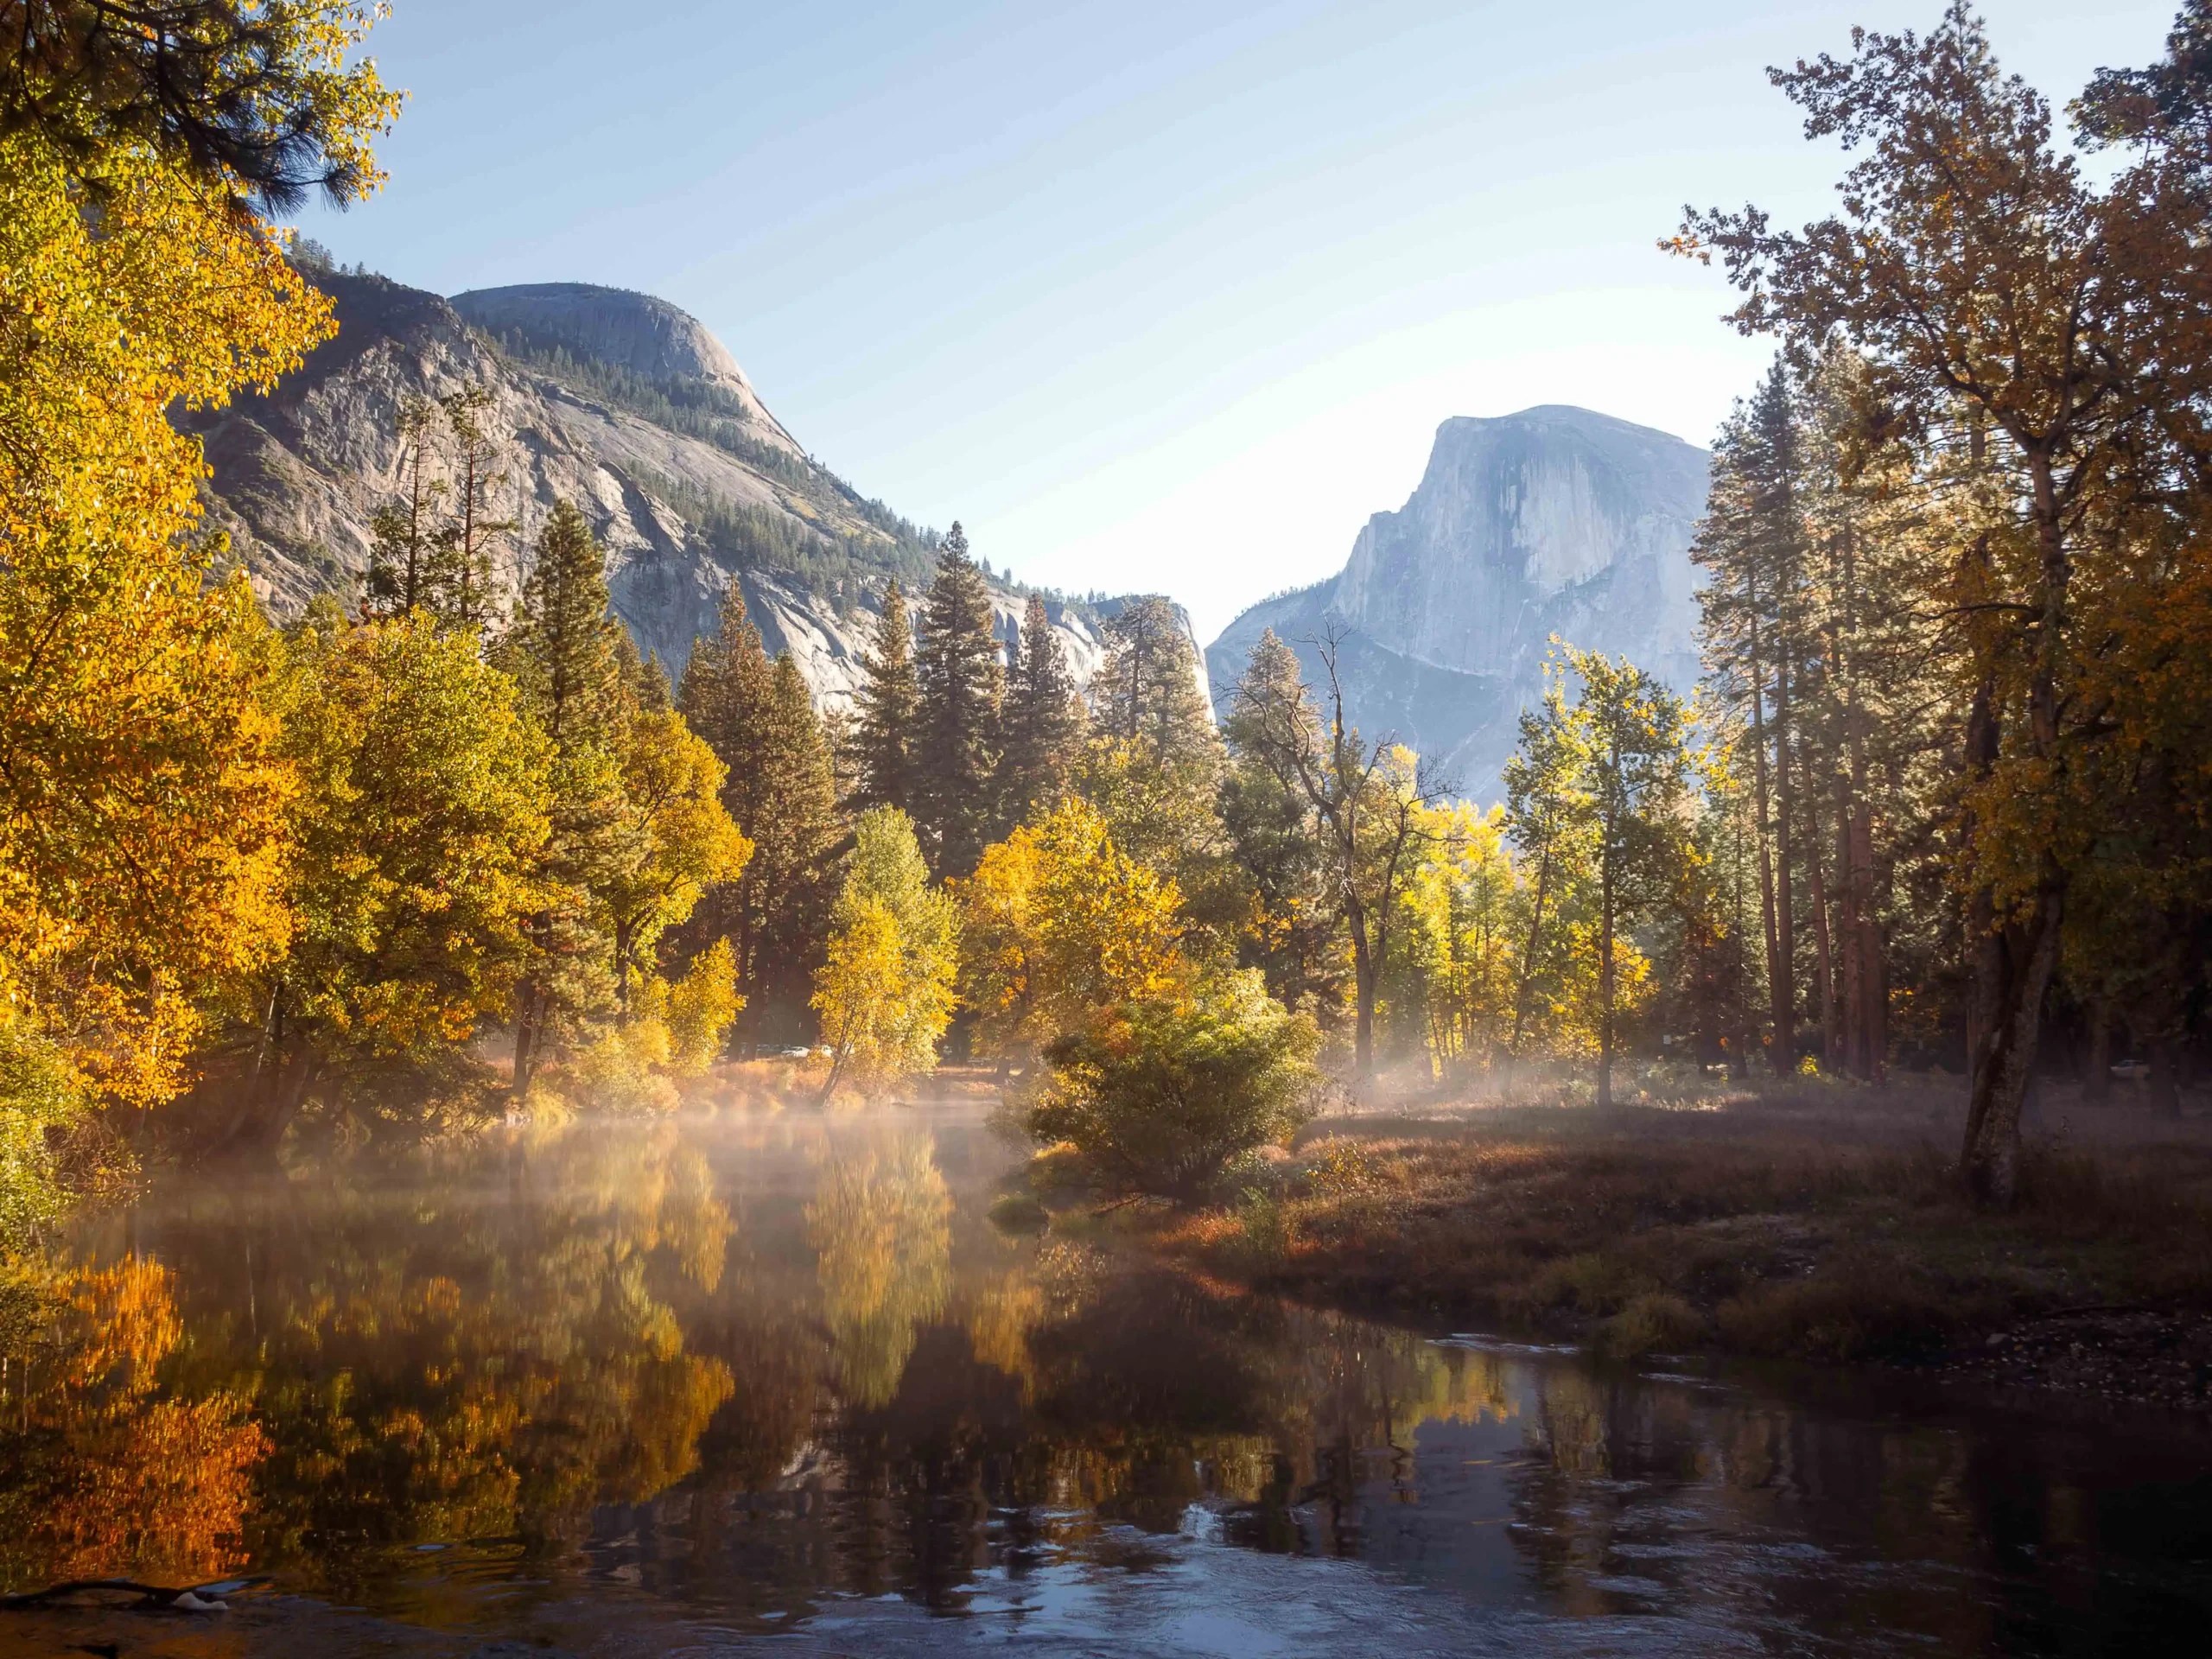
Fall is one of the best times to visit Yosemite if you want fewer crowds and beautiful scenery. I went in mid to late October and caught peak fall foliage in the valley — golden-yellow leaves, cool mornings, and absolutely stunning sunrises and sunsets.
Compared to summer, Yosemite in the fall is much less crowded, especially if you visit mid-week. It’s easier to drive around the valley, trailheads are calmer, and most roads and hikes are still open before winter closures begin.
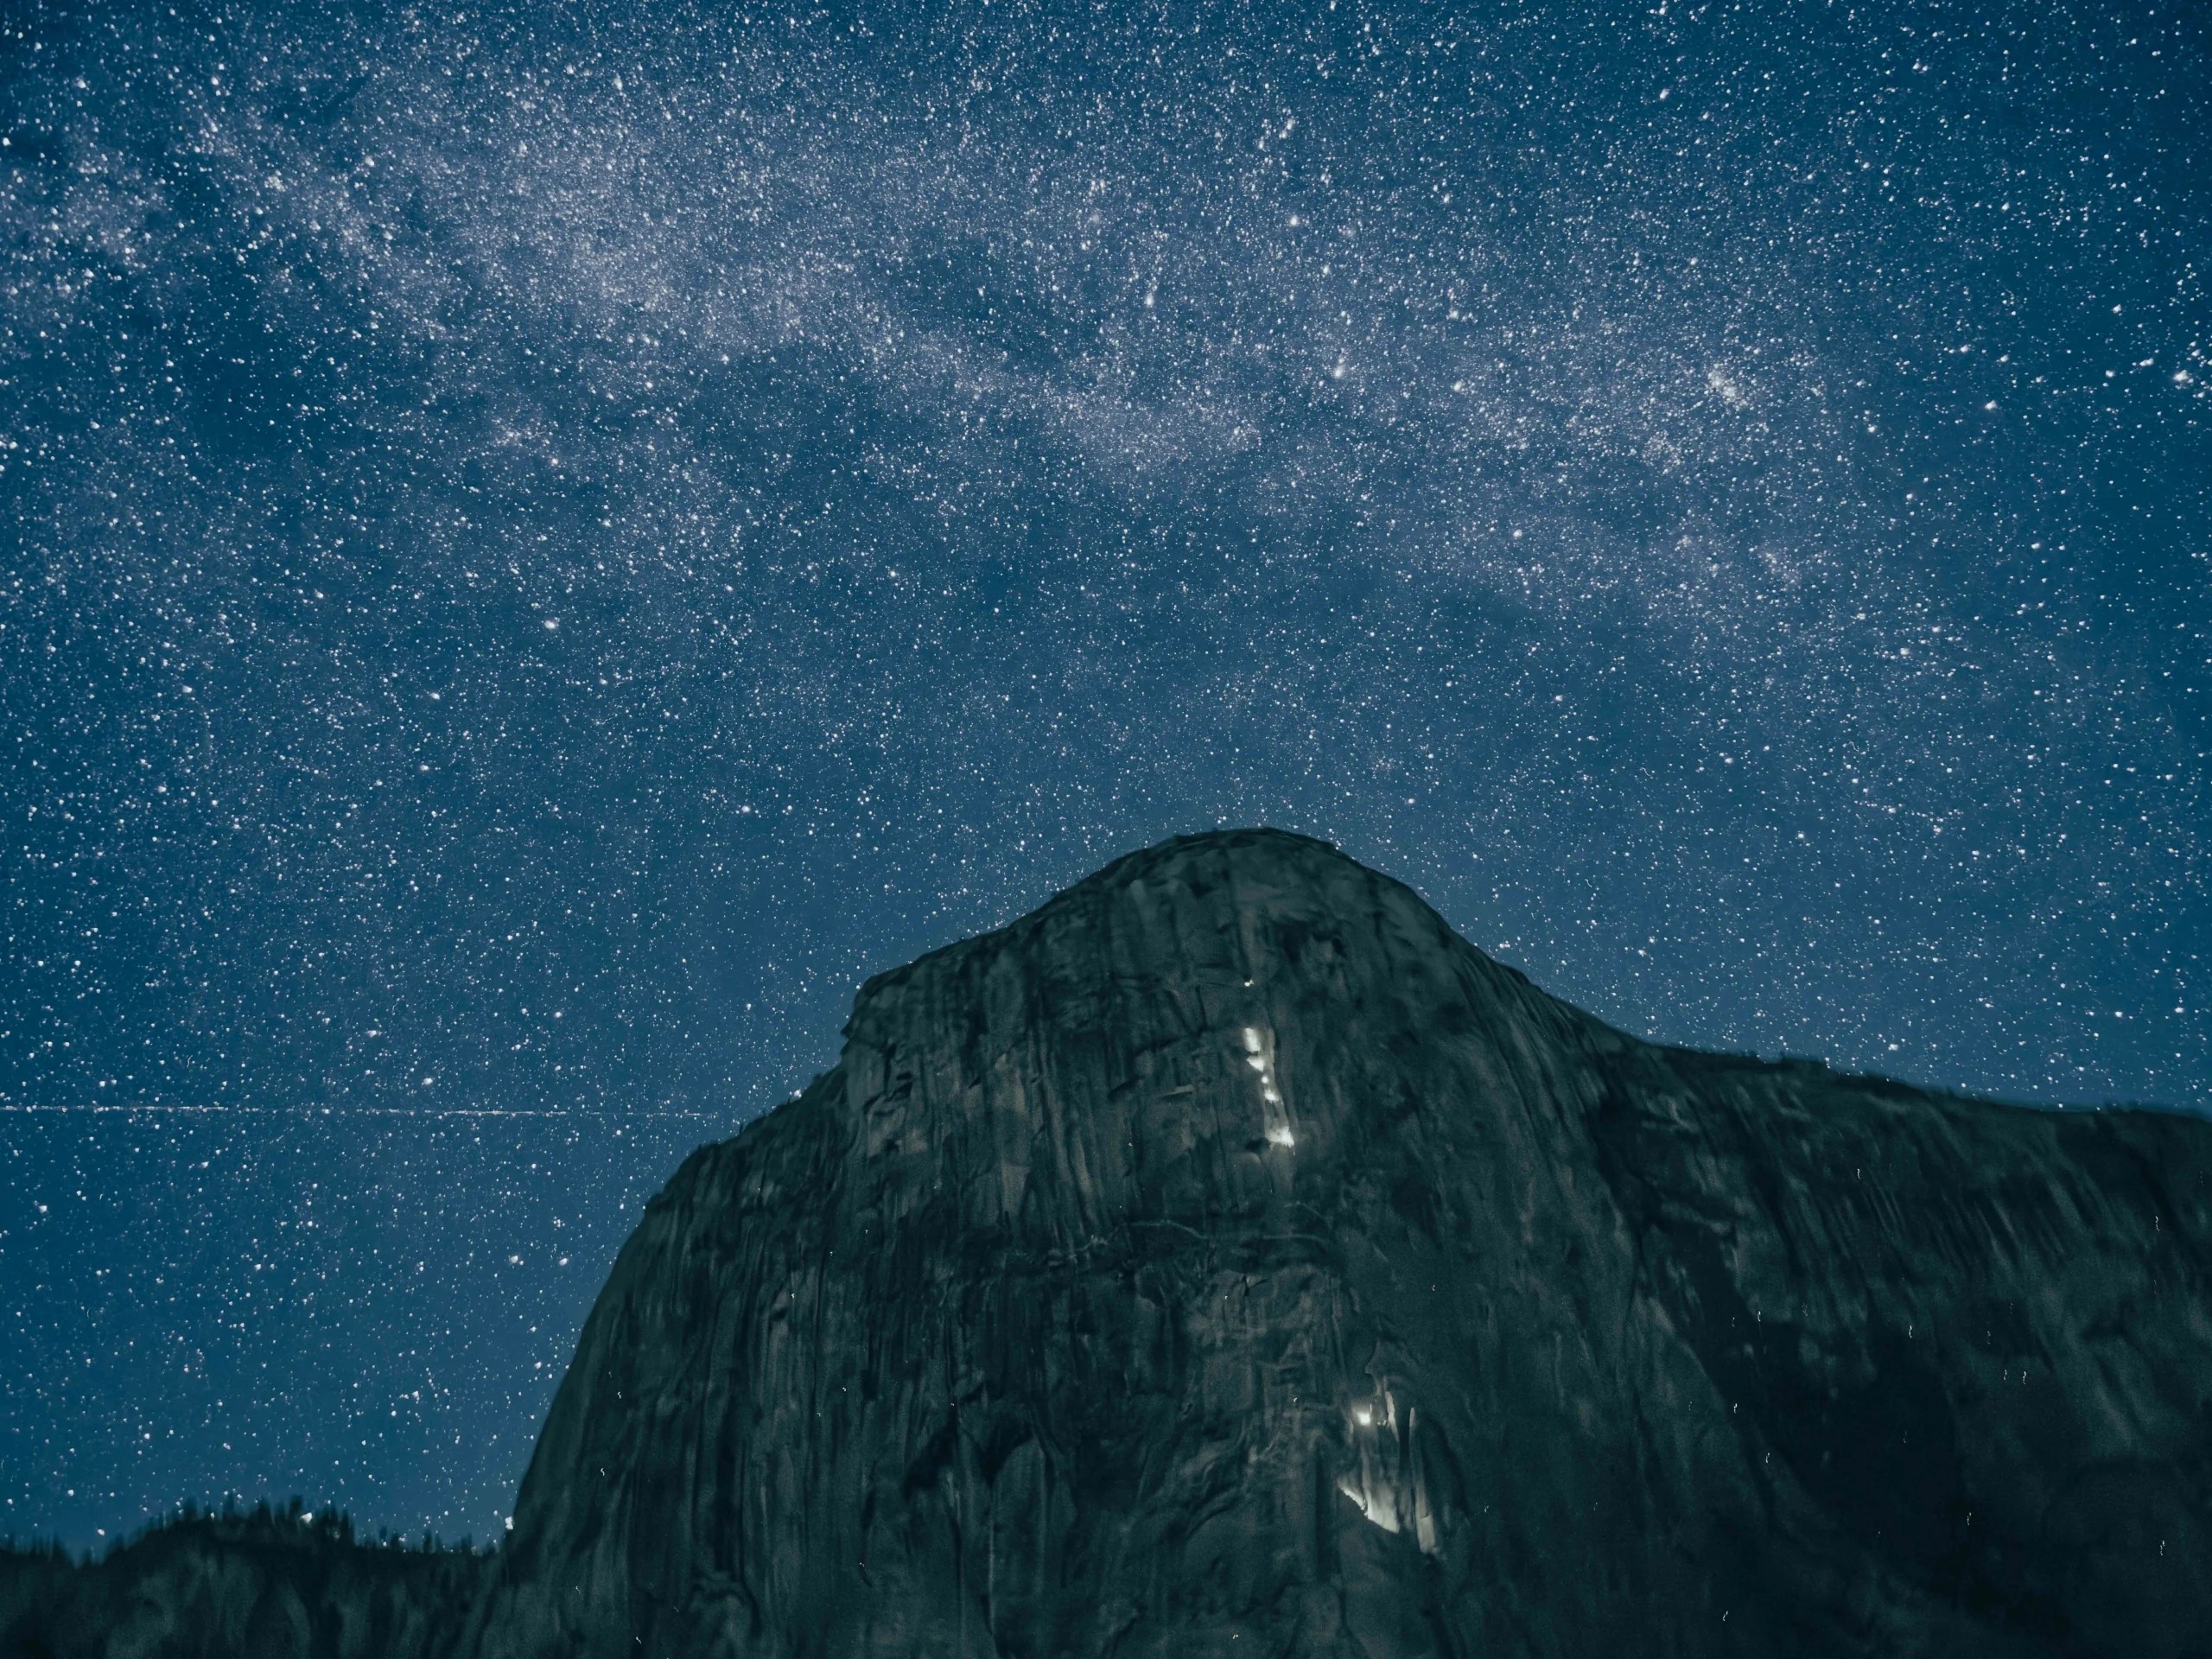
It’s also peak rock climbing season, so you’ll see climbers on El Capitan throughout the day (and night). Watching tiny headlamps move up the granite wall after dark is a sight to see!
The main downside of visiting Yosemite in the fall is that Camp 4 fills up quickly, especially with climbers. You either need to plan ahead and book early, or be ready to grab a last-minute reservation when they open two weeks out — which is exactly what I did. It takes some effort, but staying in the valley makes it worth it.
Photos: Tunnel view at night with climbers, Yosemite Valley View, Meadow near the Yosemite Valley Chapel


Winter Camping in Yosemite
Winter in Yosemite National Park is quieter, colder, and incredibly beautiful. The crowds thin out, the air feels crisp and clean, and if you time it right, you’ll see Yosemite Valley covered in snow.
For this trip, we booked a heated tent at Camp Curry because we weren’t sure what the weather would bring. That decision paid off — we arrived in the middle of a winter storm. Having a warm place to sleep made all the difference and turned what could have been a wet and cold trip into a cozy, memorable one.
Why Staying in Yosemite Valley Is So Worth It
If you can stay in Yosemite Valley, do it. And if you’re close enough for a day trip, it’s still 100% worth waking up early for sunrise and sticking around for sunset.
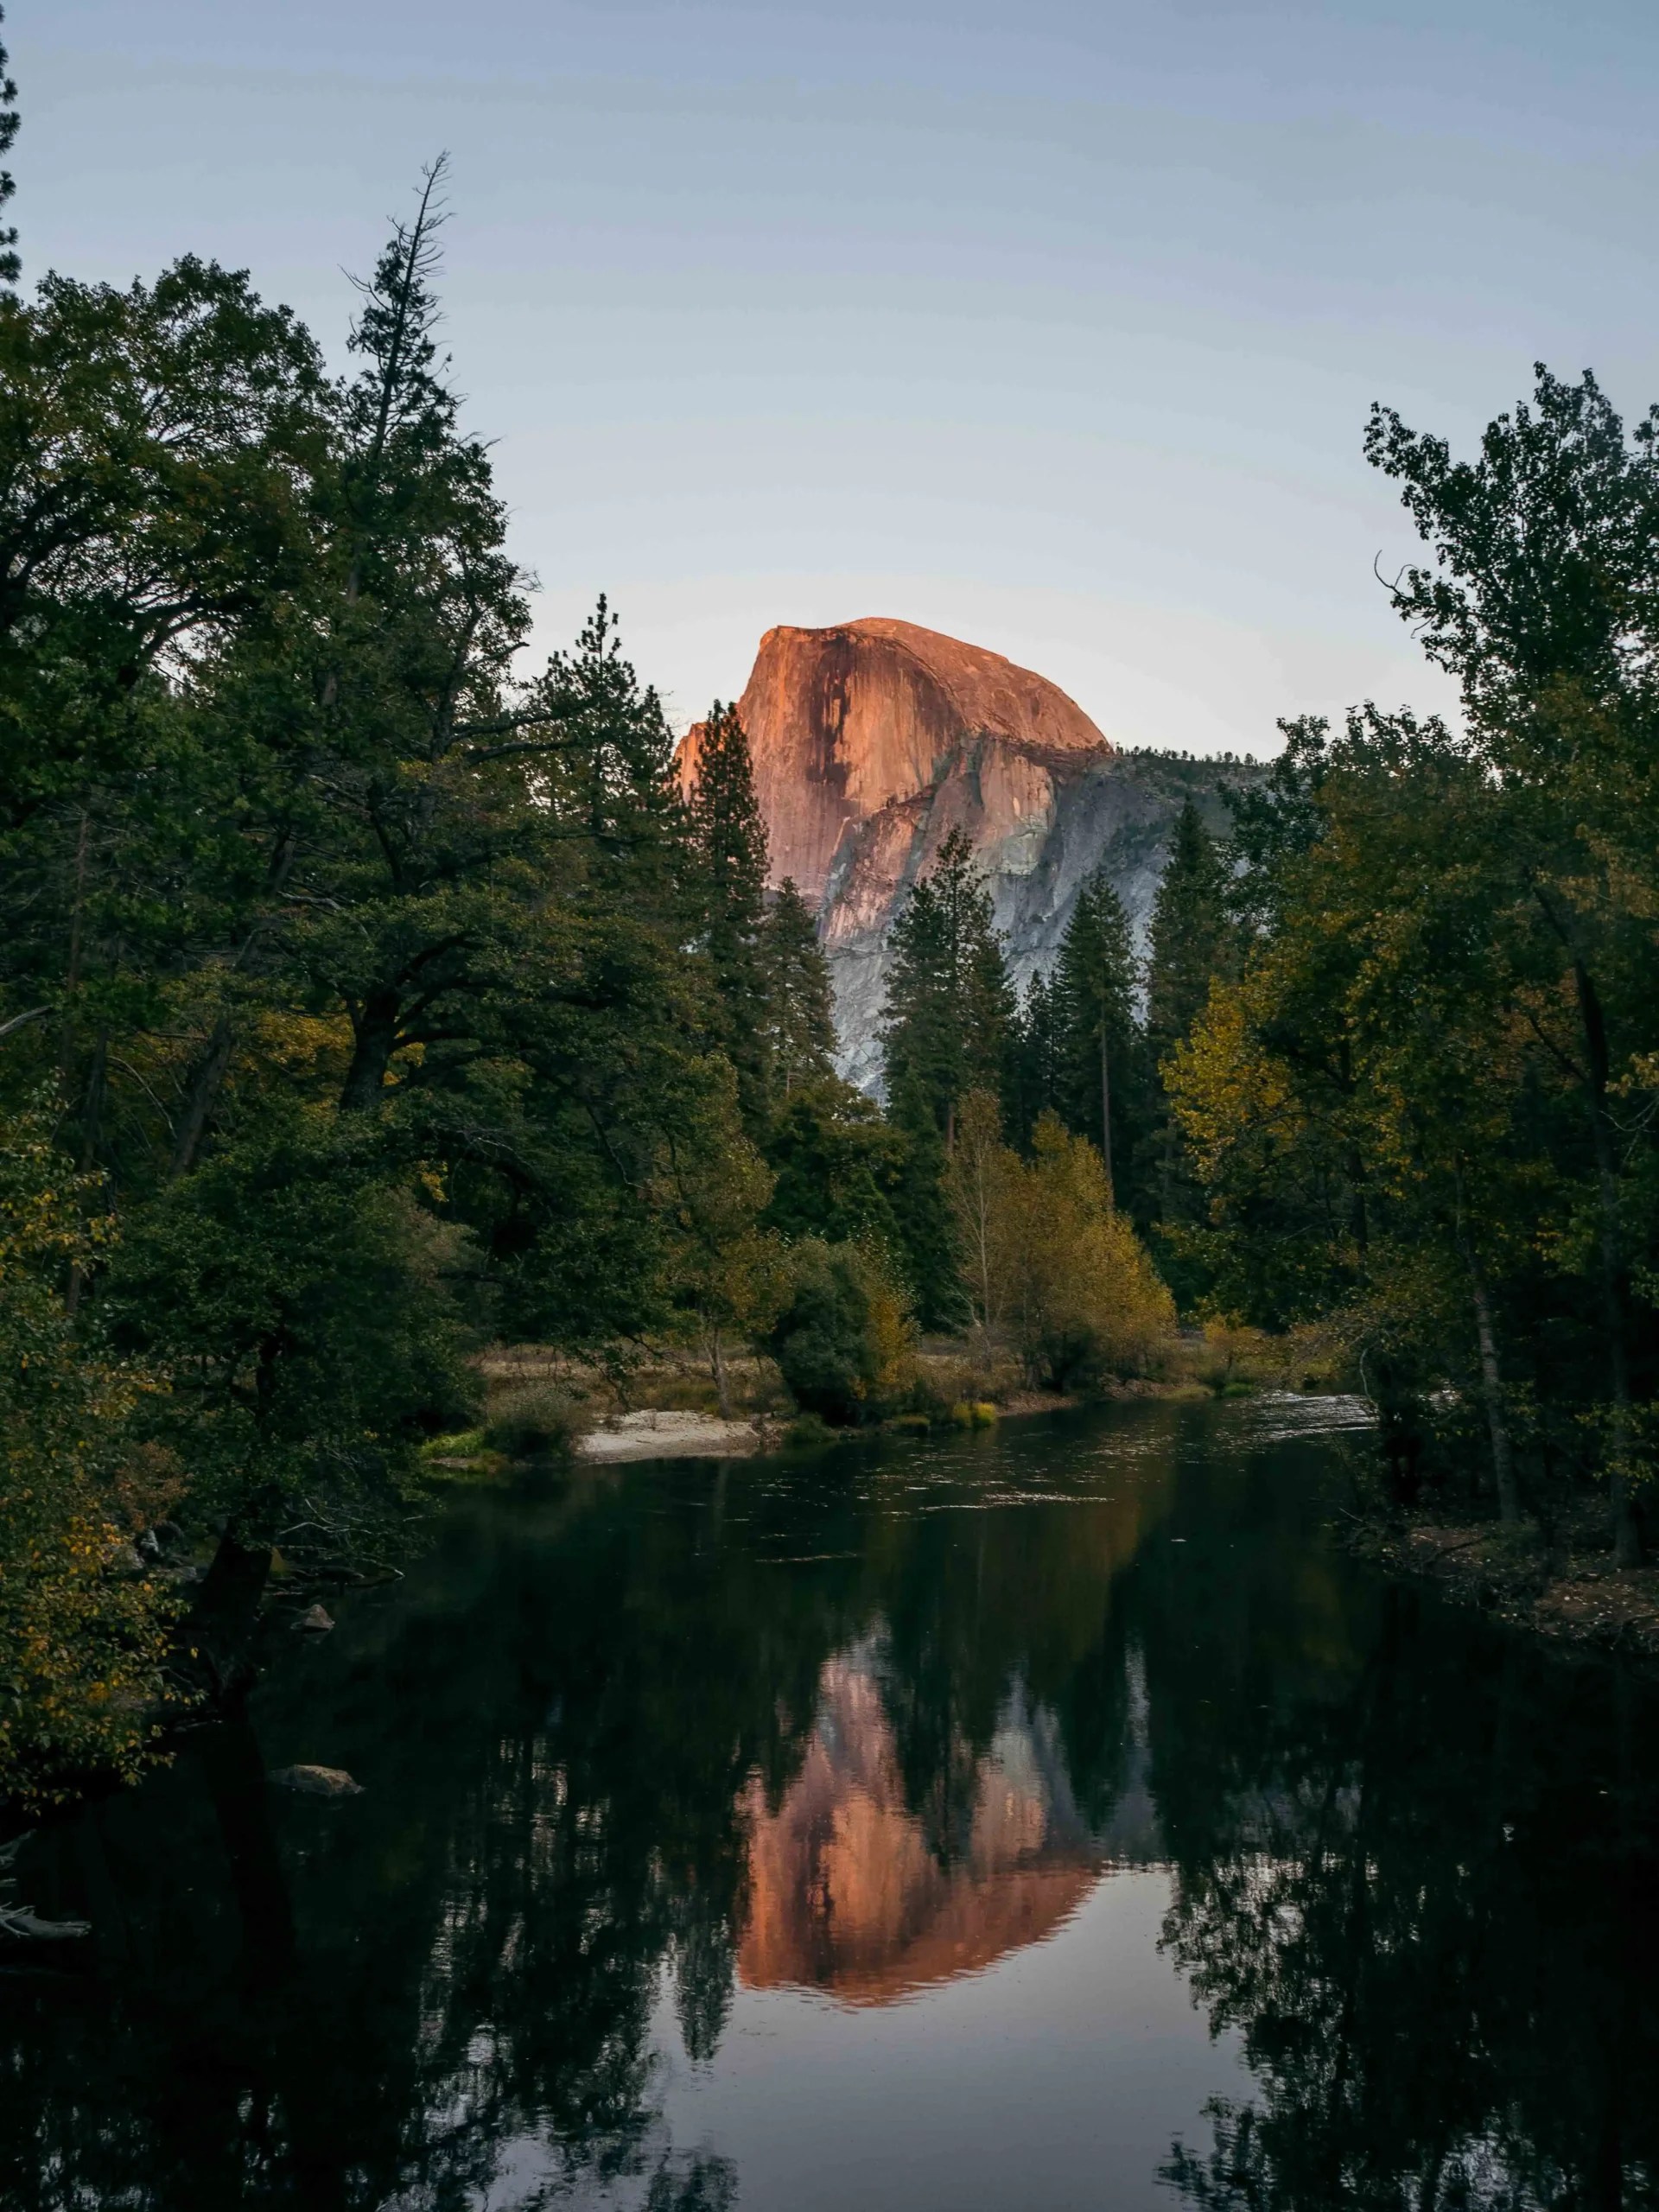
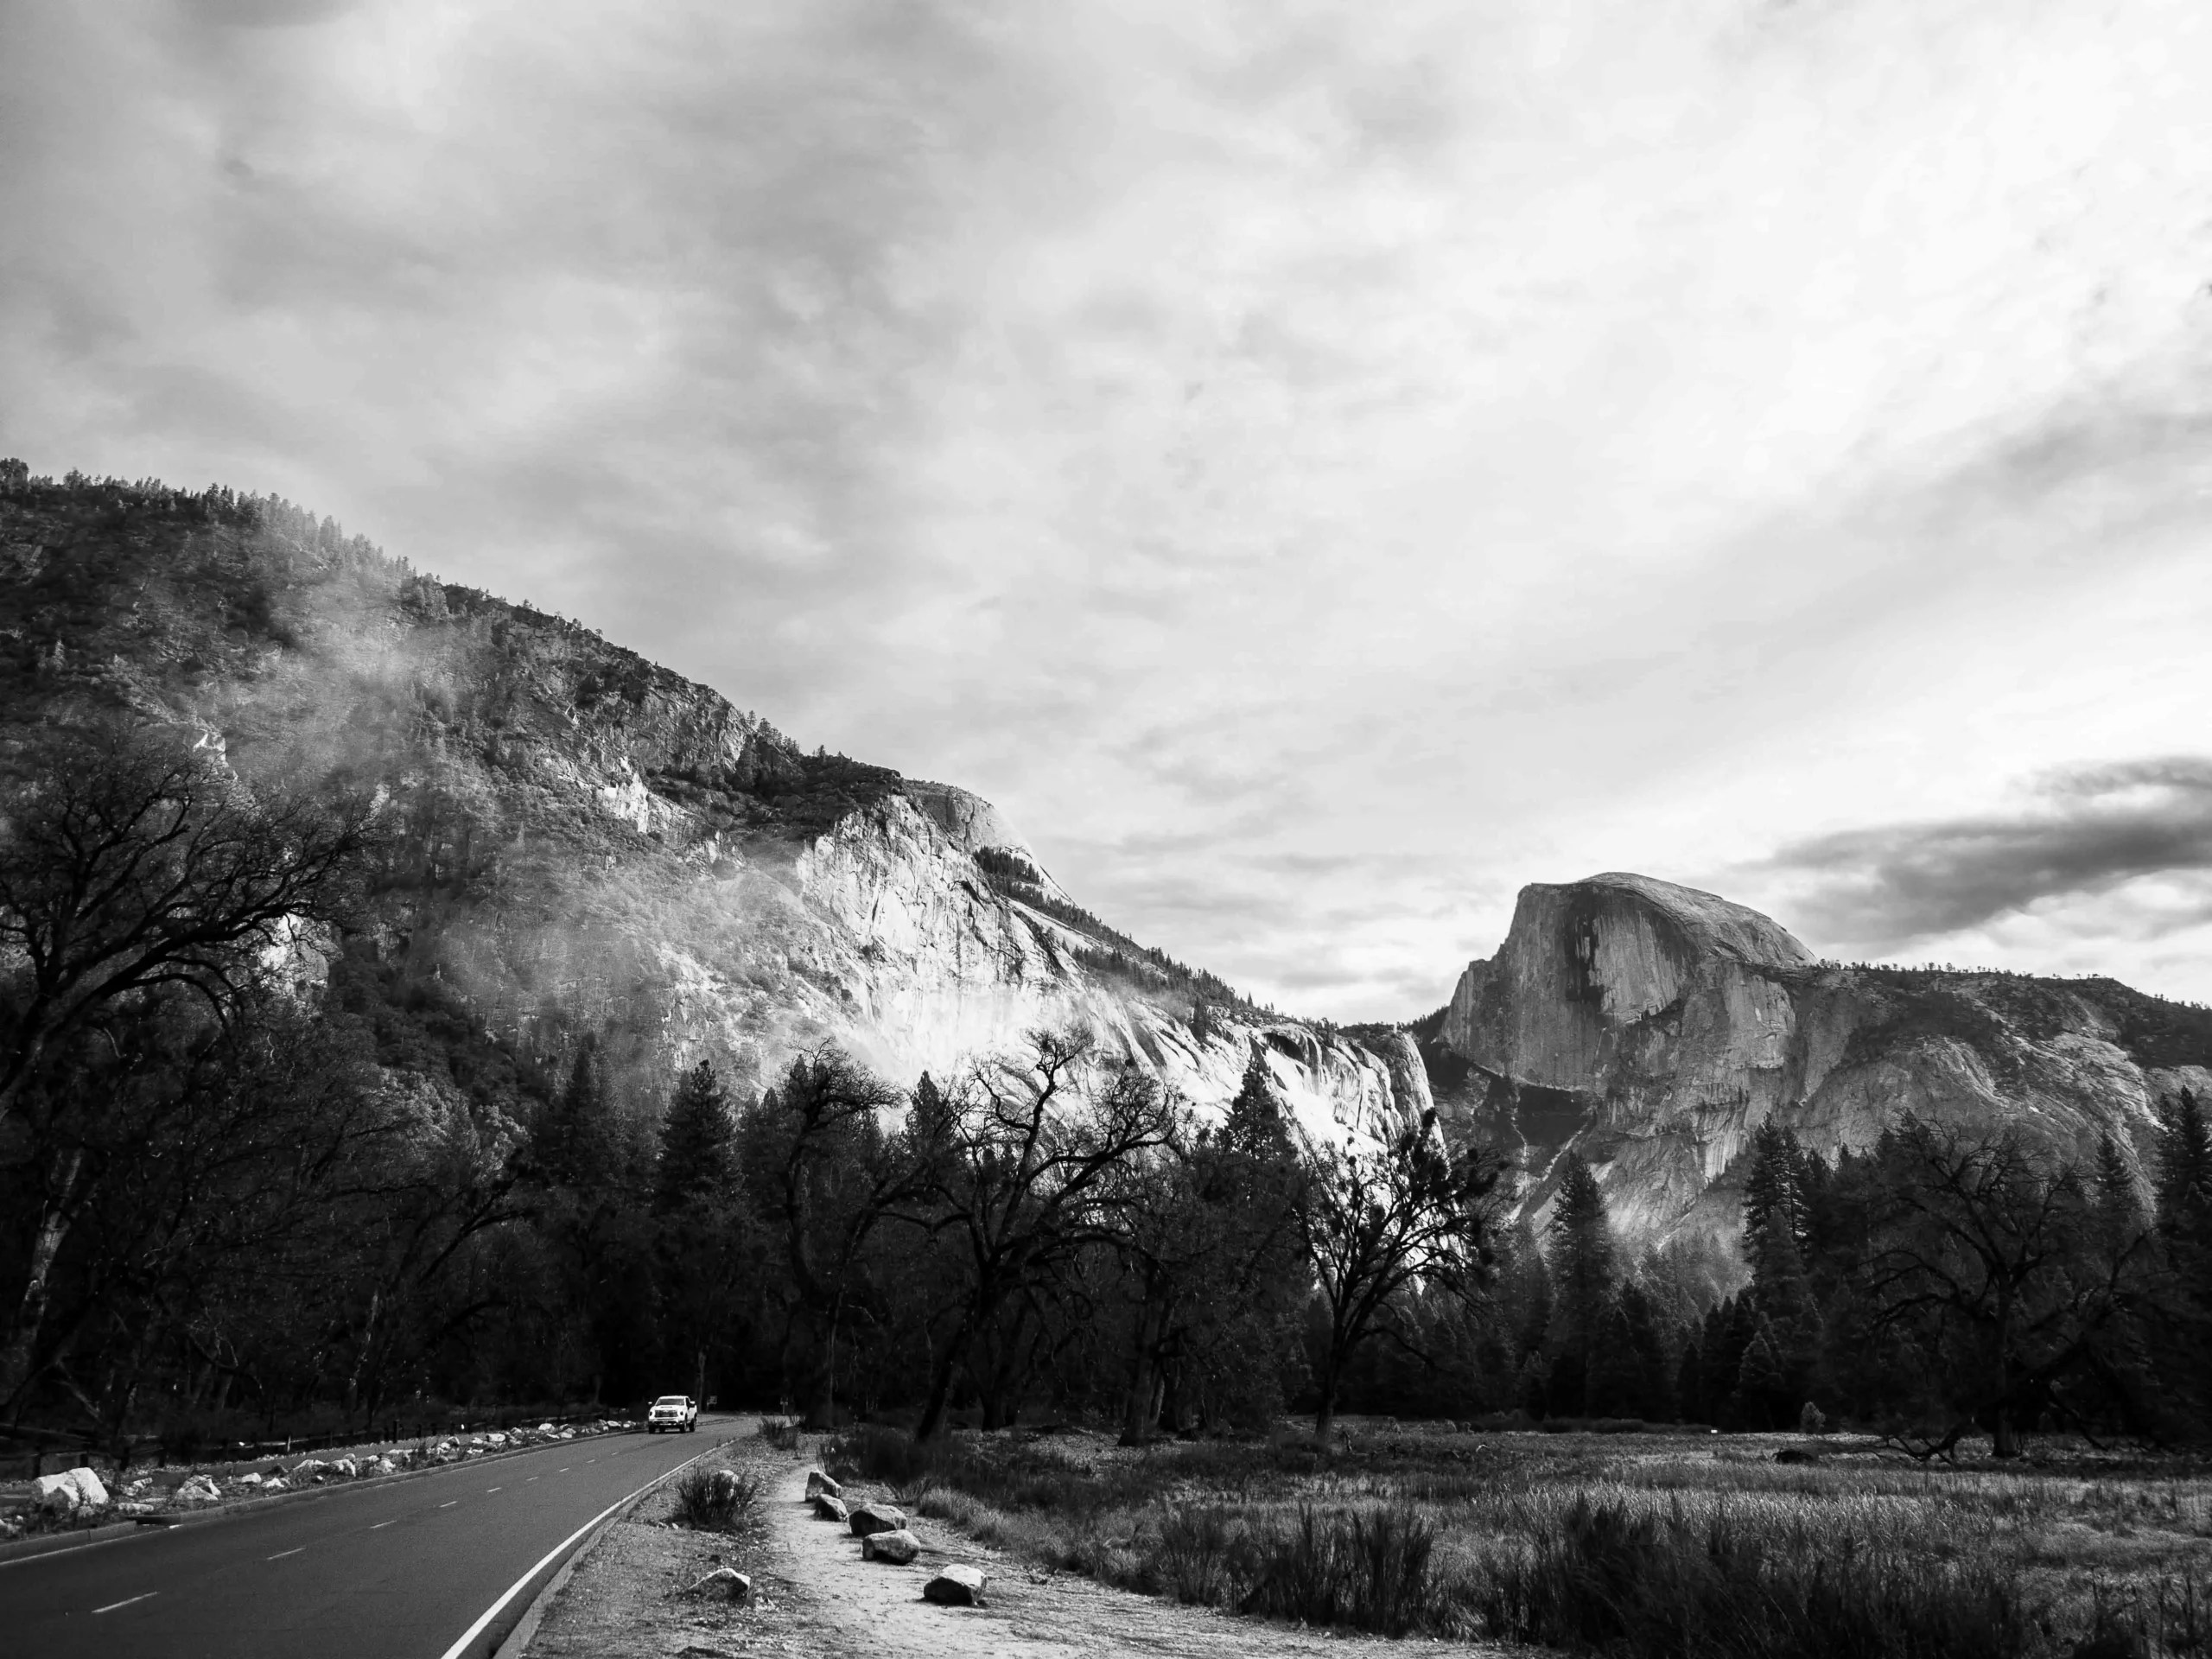
Before these trips, I had only visited Yosemite on day trips. While beautiful, they don’t compare to staying overnight and watching how the light changes throughout the day. Mornings often start with fog rolling through the valley before slowly lifting, and at sunset, Half Dome glows red and purple in a way that feels almost unreal.
Now I understand why Yosemite is such a dream destination for photographers — and why legends like Ansel Adams and John Muir were so inspired by this place.
Daytime in Yosemite is still incredible, but the magic really happens early in the morning and in the evening. Stargazing in Yosemite Valley is also amazing. In October, I caught a meteor shower while watching climbers’ headlamps move up El Capitan from the meadow at night.
Where I Stayed in Yosemite Valley
Camp 4 (Best Budget Camping in Yosemite Valley)
Camp 4 is a historic, walk-in campground right in Yosemite Valley and one of the most popular places to camp in the park.
It books up fast, so planning ahead is key. You’ll walk your gear into the campsite and share the space with up to six people. Everyone gets their own bear locker, and there are communal bathrooms nearby. There are no showers at Camp 4, but you can use the showers at Camp Curry or Housekeeping Camp.
At $10 per person per night, it’s one of the best budget camping options in Yosemite — especially considering the location.
It does take some getting used to camping so close to others but with a price and location like this, its defintely worth it!*


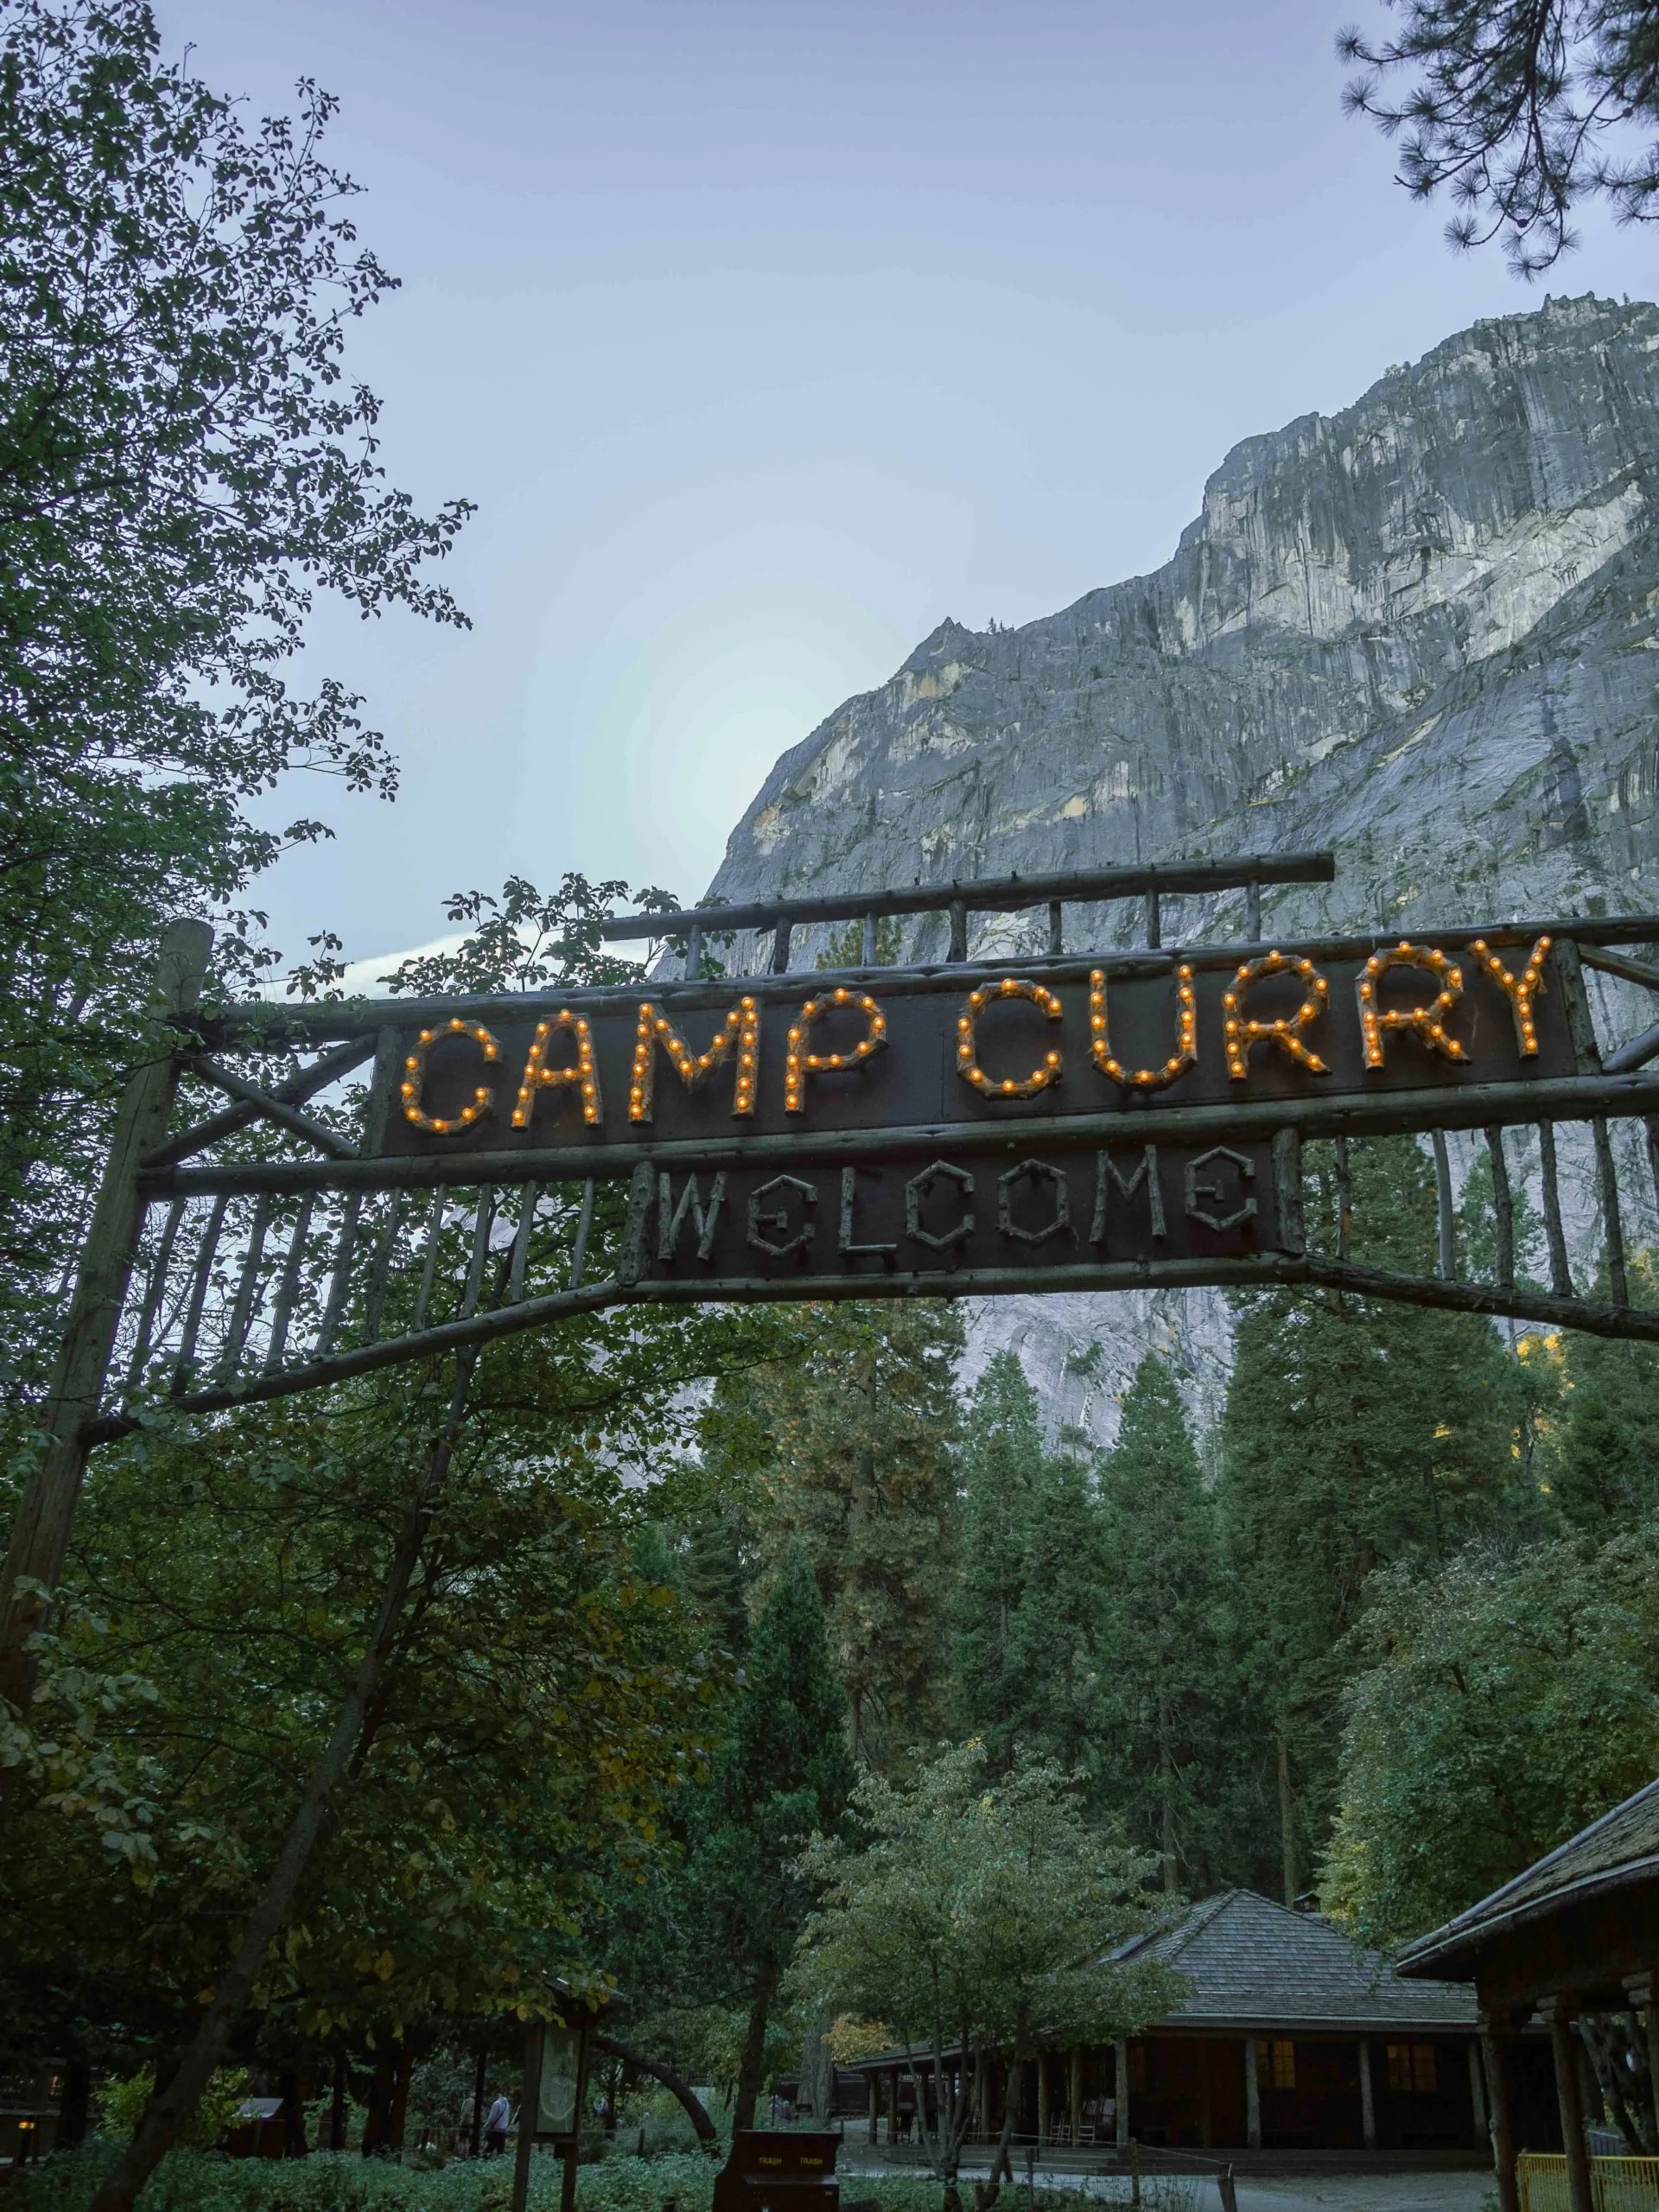
Camp Curry (Curry Village Tents)
Camp Curry (also called Curry Village) offers both unheated and heated canvas tents with simple bunks and bedding.
- Unheated tents start around $126 per night
- Heated tents start around $182 per night
- Tents come with 1–4 beds
You can’t cook directly at your tent due to bears, but the food court area has microwaves, toasters, and hot water, which makes it easy to prepare simple meals or morning coffee.

🏨 Other Yosemite Lodging Options
You’ll find additional lodging outside the valley in places like Wawona and Mariposa, along with several mountain lodges scattered throughout Yosemite. These can be more budget-friendly, but it’s worth keeping in mind that most of them are an hour or more from Yosemite Valley.
If you’re staying multiple days, that can easily turn into two hours of driving every day, which (in my opinion) starts to eat into the experience. Depending on what you save on lodging, the extra drive time may not be worth it — especially if sunrise, sunset, or spending long days in the valley are priorities for you.
Personally I think staying in Yosemite Valley is absolutely worth the extra cost/ planning to stay in Camp 4 or Camp Curry.
You can browse more Yosemite lodging options here.
My Daily Yosemite Routine
I’d wake up about an hour before sunrise and head straight to my first photo spot of the morning. From there, I’d chase the morning light around the valley until about 10 or 11 a.m., when the light starts to get a little harsher.
After that, I’d grab food and set up at Degnan Café — one of the only spots in Yosemite Valley with free Wi-Fi — and work during the middle of the day. It was the perfect way to balance travel and remote work while still being surrounded by incredible scenery.
About one to two hours before sunset, I’d head back out to catch golden hour and sunset. Once it got dark, I’d either cook dinner back at camp or walk over to the food court at Yosemite Valley Lodge, which is conveniently located across the street from Camp 4.
Some nights ended there. Other nights? I’d take a short nap, grab my layers, and head back out for a few hours of stargazing — watching climbers’ headlamps light up El Capitan in the darkness is something I never got tired of.
Best Photography Spots in Yosemite Valley (Places I Went Back to Again and Again)
These are the Yosemite Valley locations I photographed multiple times — each one looks completely different depending on the light, weather, and time of day:
Photos: Yosemite falls from Swinging Bridge picnic area, Road outside of Camp Curry, Half Dome at sunset on Sentinel bridge


*Google Map Locations Linked*
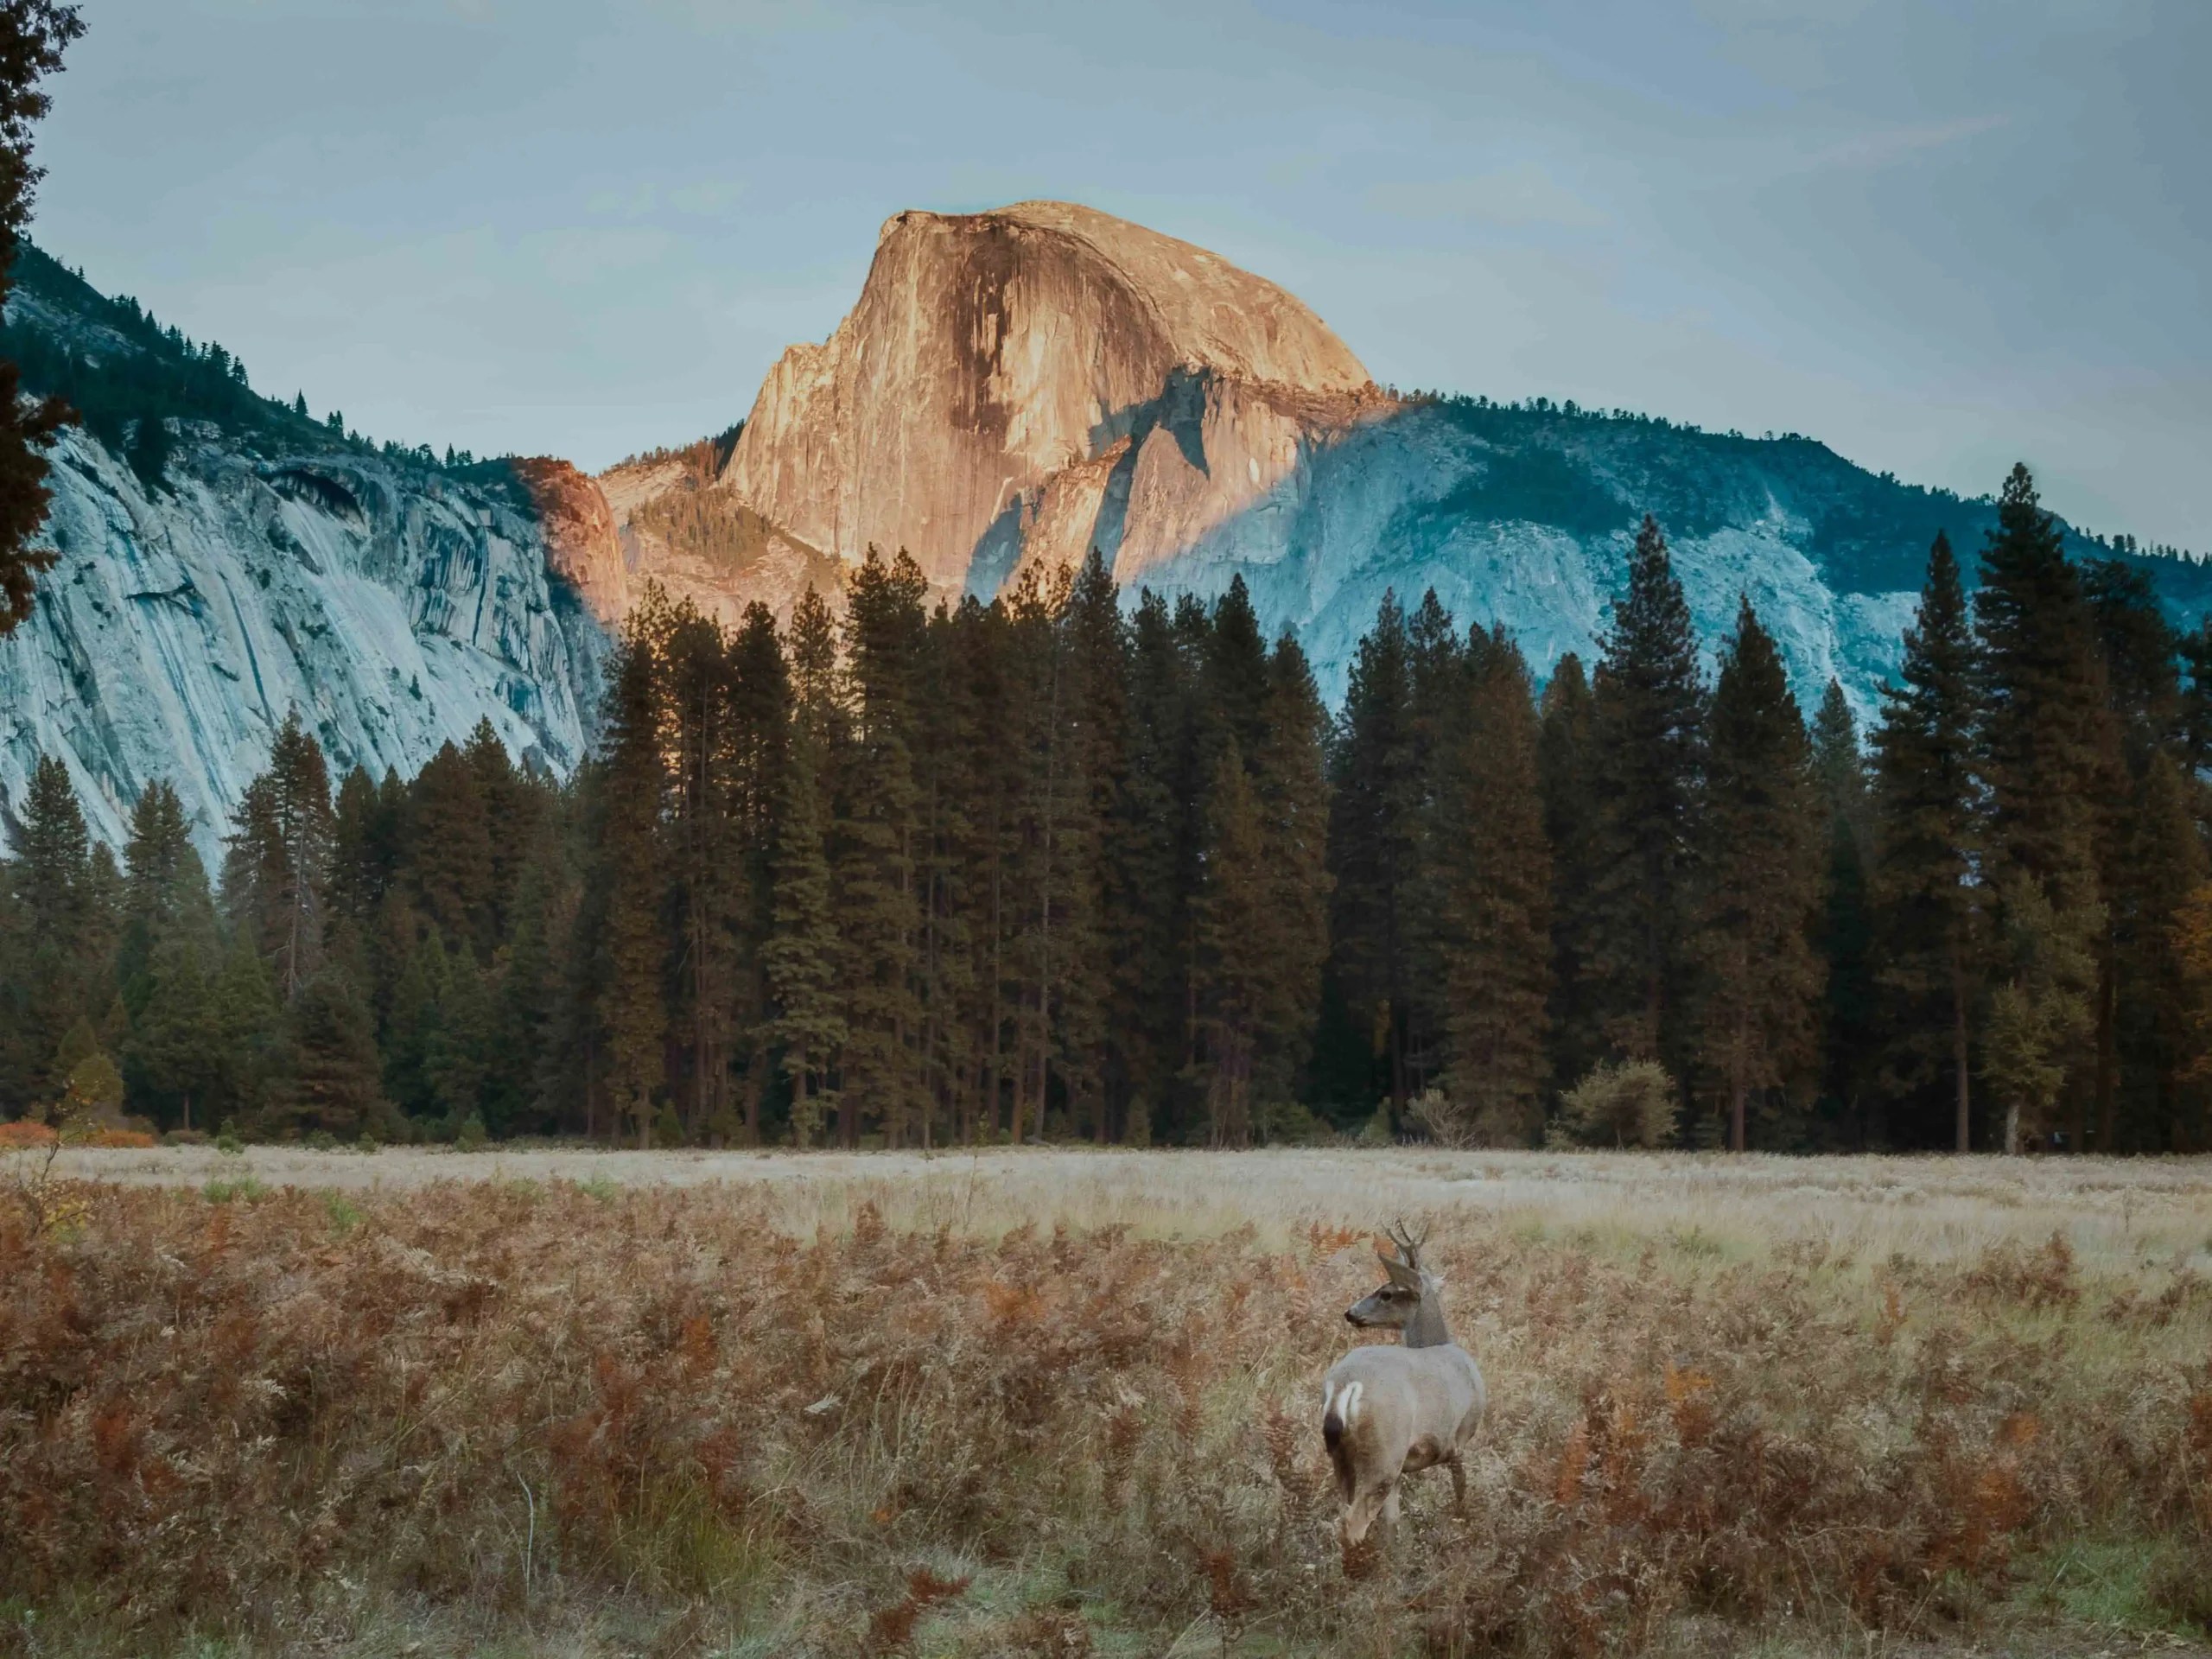
- Cook’s Meadow (Oak Tree)
- Close to Yosemite Village and Yosemite Lower Falls – perfect for views of Half Dome
- Good place to spot deer in the meadow
- Tunnel View
- Iconic view of the valley featuring: Half Dome, El Capitan, and Bridalveil falls
- Sentinel Bridge
- For reflections of Half Dome in the river
- Swinging Bridge Picnic Area
- El Capitan Meadow
- Meadow near the Yosemite Valley Chapel (great view of Yosemite Falls)
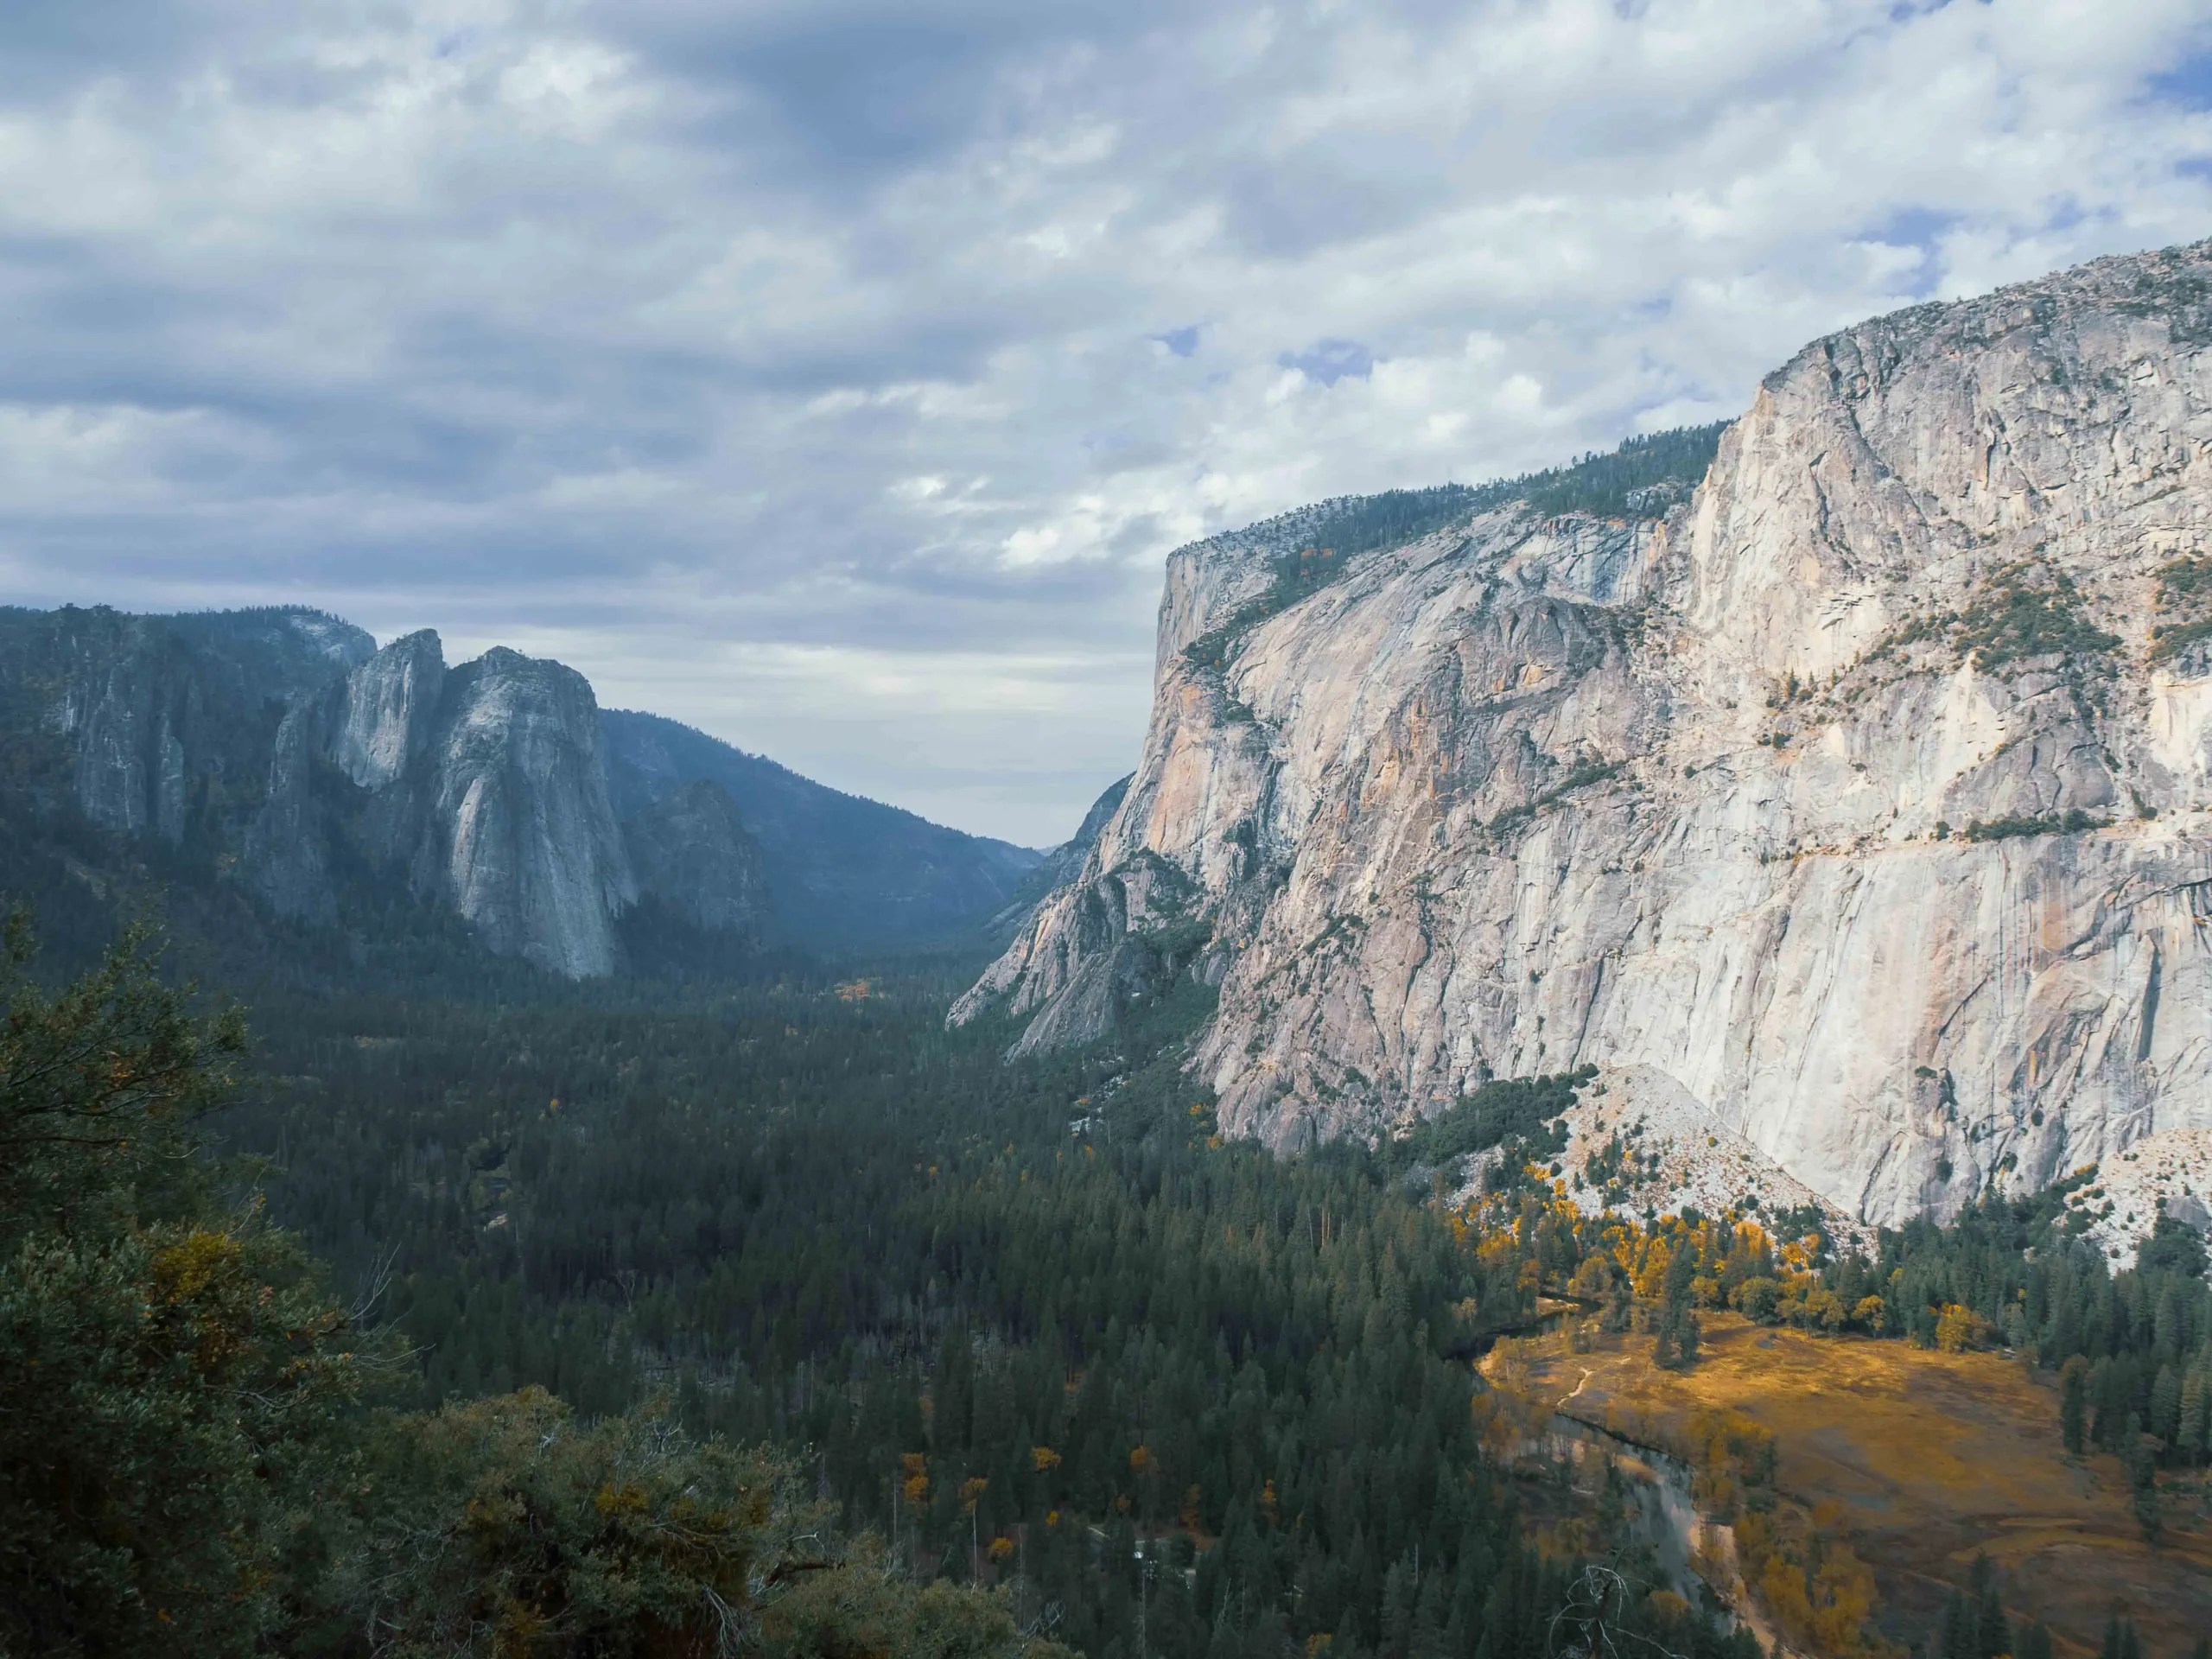
- Yosemite Valley View
- Breathtaking view of the river with El Capitan and Bridalveil falls
- Superintendent’s Bridge
- A further view of Half dome reflected on the river (relative to Sentinel Bridge)
- Road past Camp Curry toward the campgrounds
- Another view of Half Dome and El Capitan
If you’re into photography, don’t feel like you need to constantly chase new locations. Revisiting the same spots in different conditions is half the magic in Yosemite.
Photos: El Capitan meadow in the morning fog, View of Half Dome from Superintendent’s bridge. Deer in Cook’s Meadow
Easy & Short Hiking Trails in Yosemite valley
I stuck mostly to shorter hikes and scenic walks in the valley, which are perfect if you want amazing views without committing to a full-day hike.
Some of my favorite hikes from Yosemite valley:
- Cook Meadow Loop
- Lower Yosemite Falls
- Bridalveil Fall
- Mirror Lake*
*Mirror Lake is a very short and easy hike, but it’s highly seasonal. It’s really only worth visiting in winter and spring when the water levels are high. Otherwise, it looks more like a puddle than an actual lake. The trail is also bike-friendly almost the entire way, which makes it even more accessible.
The 4 Mile Trail (Split Into Two Parts)
I also did part of the 4 Mile Trail, which offers some of the best views of Yosemite Valley. Despite the name, this hike is actually closer to 10 miles round trip with significant elevation gain, climbing from the valley floor all the way up to Glacier Point.
Photos from the first section:


Instead of hiking the entire thing in one go, I split it into two sections:
- One day, I hiked from the valley floor up to about halfway through the second set of switchbacks.
- On another day, I drove up to Glacier Point and hiked down to the top portion of the switchbacks.
By October, there’s no public transportation running to or from Glacier Point, so this approach let me experience the best views without spending an entire day on one very strenuous hike — especially since I planned to drive up to Glacier Point anyway.
Photos from the last section:


Sentinel Dome (One of the Best Sunset Hikes in Yosemite)
Sentinel Dome, located along the drive to Glacier Point, was one of my favorite hikes of the trip and a go-to spot for sunset.
It’s about 2.2 miles round trip from the parking lot to the top, making it a relatively easy hike with absolutely unreal views. From the summit, you can see Yosemite Valley on one side and Half Dome on the other.
Highly recommend this hike — just make sure to bring a powerful headlamp or flashlight. Finding the trail on the way back down in the dark can be tricky. I definitely got turned around for a good 5–10 minutes before figuring it out.


Taft Point (Shares the same trailhead as Sentinel Dome)
Taft Point is another great stop along the Glacier Point Road and an easy add-on if you’re already up there. The hike is short (about 2 miles round trip) and relatively flat, making it very doable if you’re short on time.
The views are dramatic — sheer drop-offs, fissures in the rock, and a straight-down look into Yosemite Valley. It’s especially beautiful at sunset when the light hits El Capitan across the valley.
Just a heads up: there are no railings and the cliffs are very exposed, so it’s not ideal if you’re uncomfortable with heights. But if that doesn’t bother you, it’s one of those places that really makes you stop and take it all in.
Artist Point Trail (Tunnel View Without the Crowds)
If you love Tunnel View but hate the crowds, Artist Point is one of the best short hikes in Yosemite — and somehow still flies under the radar.
This hike is about 2 miles round trip and starts directly from Tunnel View on the uphill side of the road. You’ll head up the Pohono Trail, which eventually runs all the way to Glacier Point and passes several famous viewpoints along the way (Inspiration Point, Crocker Point, Stanford Point, Dewey Point, Taft Point, and even Sentinel Dome).
For Artist Point specifically, you only need to hike about half a mile. At that point, you’ll turn left where the trail intersects the old stagecoach road into Yosemite Valley. From there, it’s just under another half mile to reach Artist Point.
One quick tip: shortly before Artist Point, you’ll pass a viewpoint that’s partially blocked by trees — this is not the spot. Keep going just a little farther and you’ll round a corner to a much clearer, higher view of Tunnel View that’s often nearly empty, even during peak season.
You’ll know you’ve reached the right place because there’s a large rock right in front of the viewpoint that’s perfect for sitting or posing on, with the valley opening up behind you.
This is an especially great option if Tunnel View is packed or you’re visiting Yosemite during peak hours and still want that iconic view without the chaos.

Biking Around Yosemite Valley
Biking is one of the best ways to get around Yosemite Valley, especially during the less crowded fall and winter months.
You can rent bikes at:
- Camp Curry
- Yosemite Village
- Yosemite Valley Lodge
Bike rentals typically cost around $30–$40 per day.
There’s also a bike share program in Yosemite Valley, where you can rent a bike for free for up to two hours using an app. I brought my own bike, so I can’t personally speak to the quality of the bike share bikes — but overall, biking is an incredible way to move through the valley and see everything at a slower pace.
Famous Yosemite Hikes I Didn’t Do (But You Might Want To)
Even though this trip was mostly photography-focused and centered around Yosemite Valley, there are a handful of classic Yosemite hikes I didn’t do this time around. Mostly due to season, time, or just wanting to keep my days a little slower — but they’re iconic for a reason.
Vernal & Nevada Falls (Mist Trail)
This is one of the most popular hikes in Yosemite, especially in spring and early summer when snowmelt makes the waterfalls powerful (and very misty). If you’re visiting earlier in the season and don’t mind crowds, it’s a great classic Yosemite hike.
Yosemite Falls (Upper Falls)
I only did the short walk to Lower Yosemite Falls, but hiking all the way to the top is a big, strenuous climb with huge views. Like most waterfall hikes in Yosemite, it’s best earlier in the year — by late summer or fall, the flow can be pretty minimal.
Half Dome
Half Dome is the bucket-list hike in Yosemite, but it requires a permit and a full day of effort. Between the planning, crowds, and the cable section, it’s not something I personally rush to do unless conditions are perfect — but if it’s been on your list forever, it’s absolutely iconic.
Clouds Rest
Clouds Rest is often recommended as a quieter, even more epic alternative to Half Dome. It’s a long and challenging hike, but the views from the top — looking straight down at Half Dome and across the high country — are unreal.
Beyond Yosemite Valley (If You Have Extra Time)
If you have more than a couple of days in Yosemite and you’re visiting when roads are open, these spots are worth knowing about.
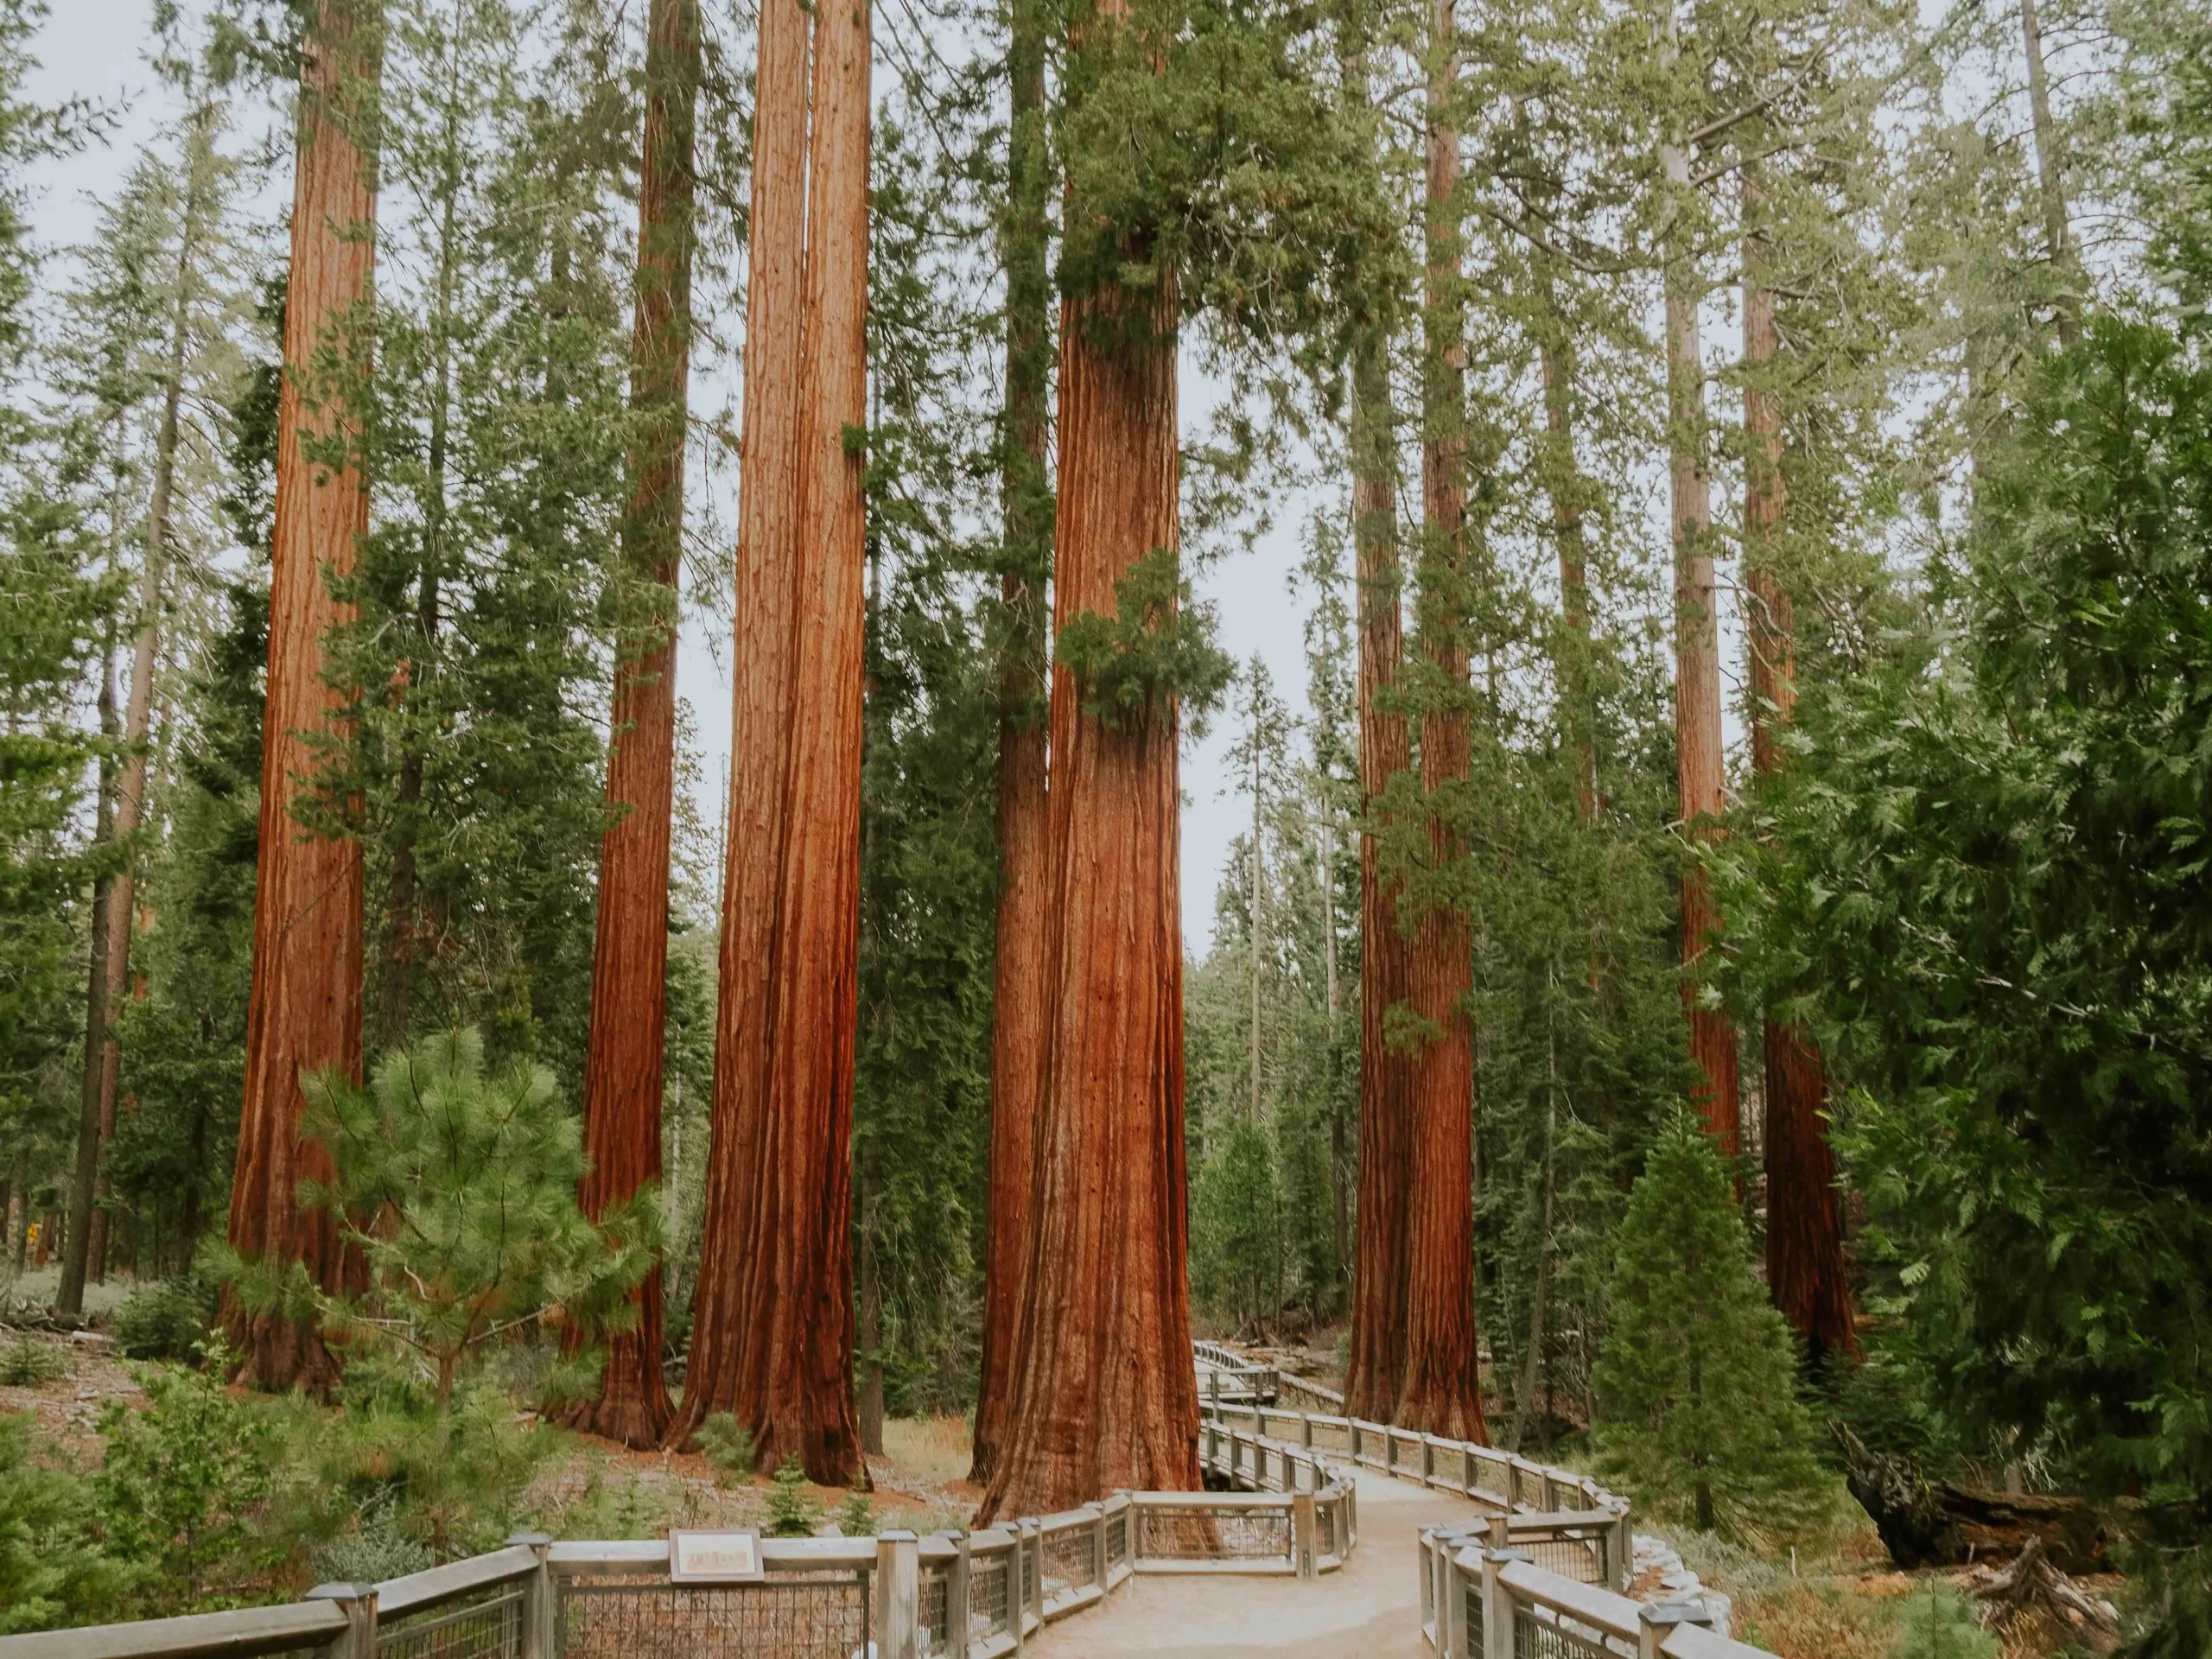
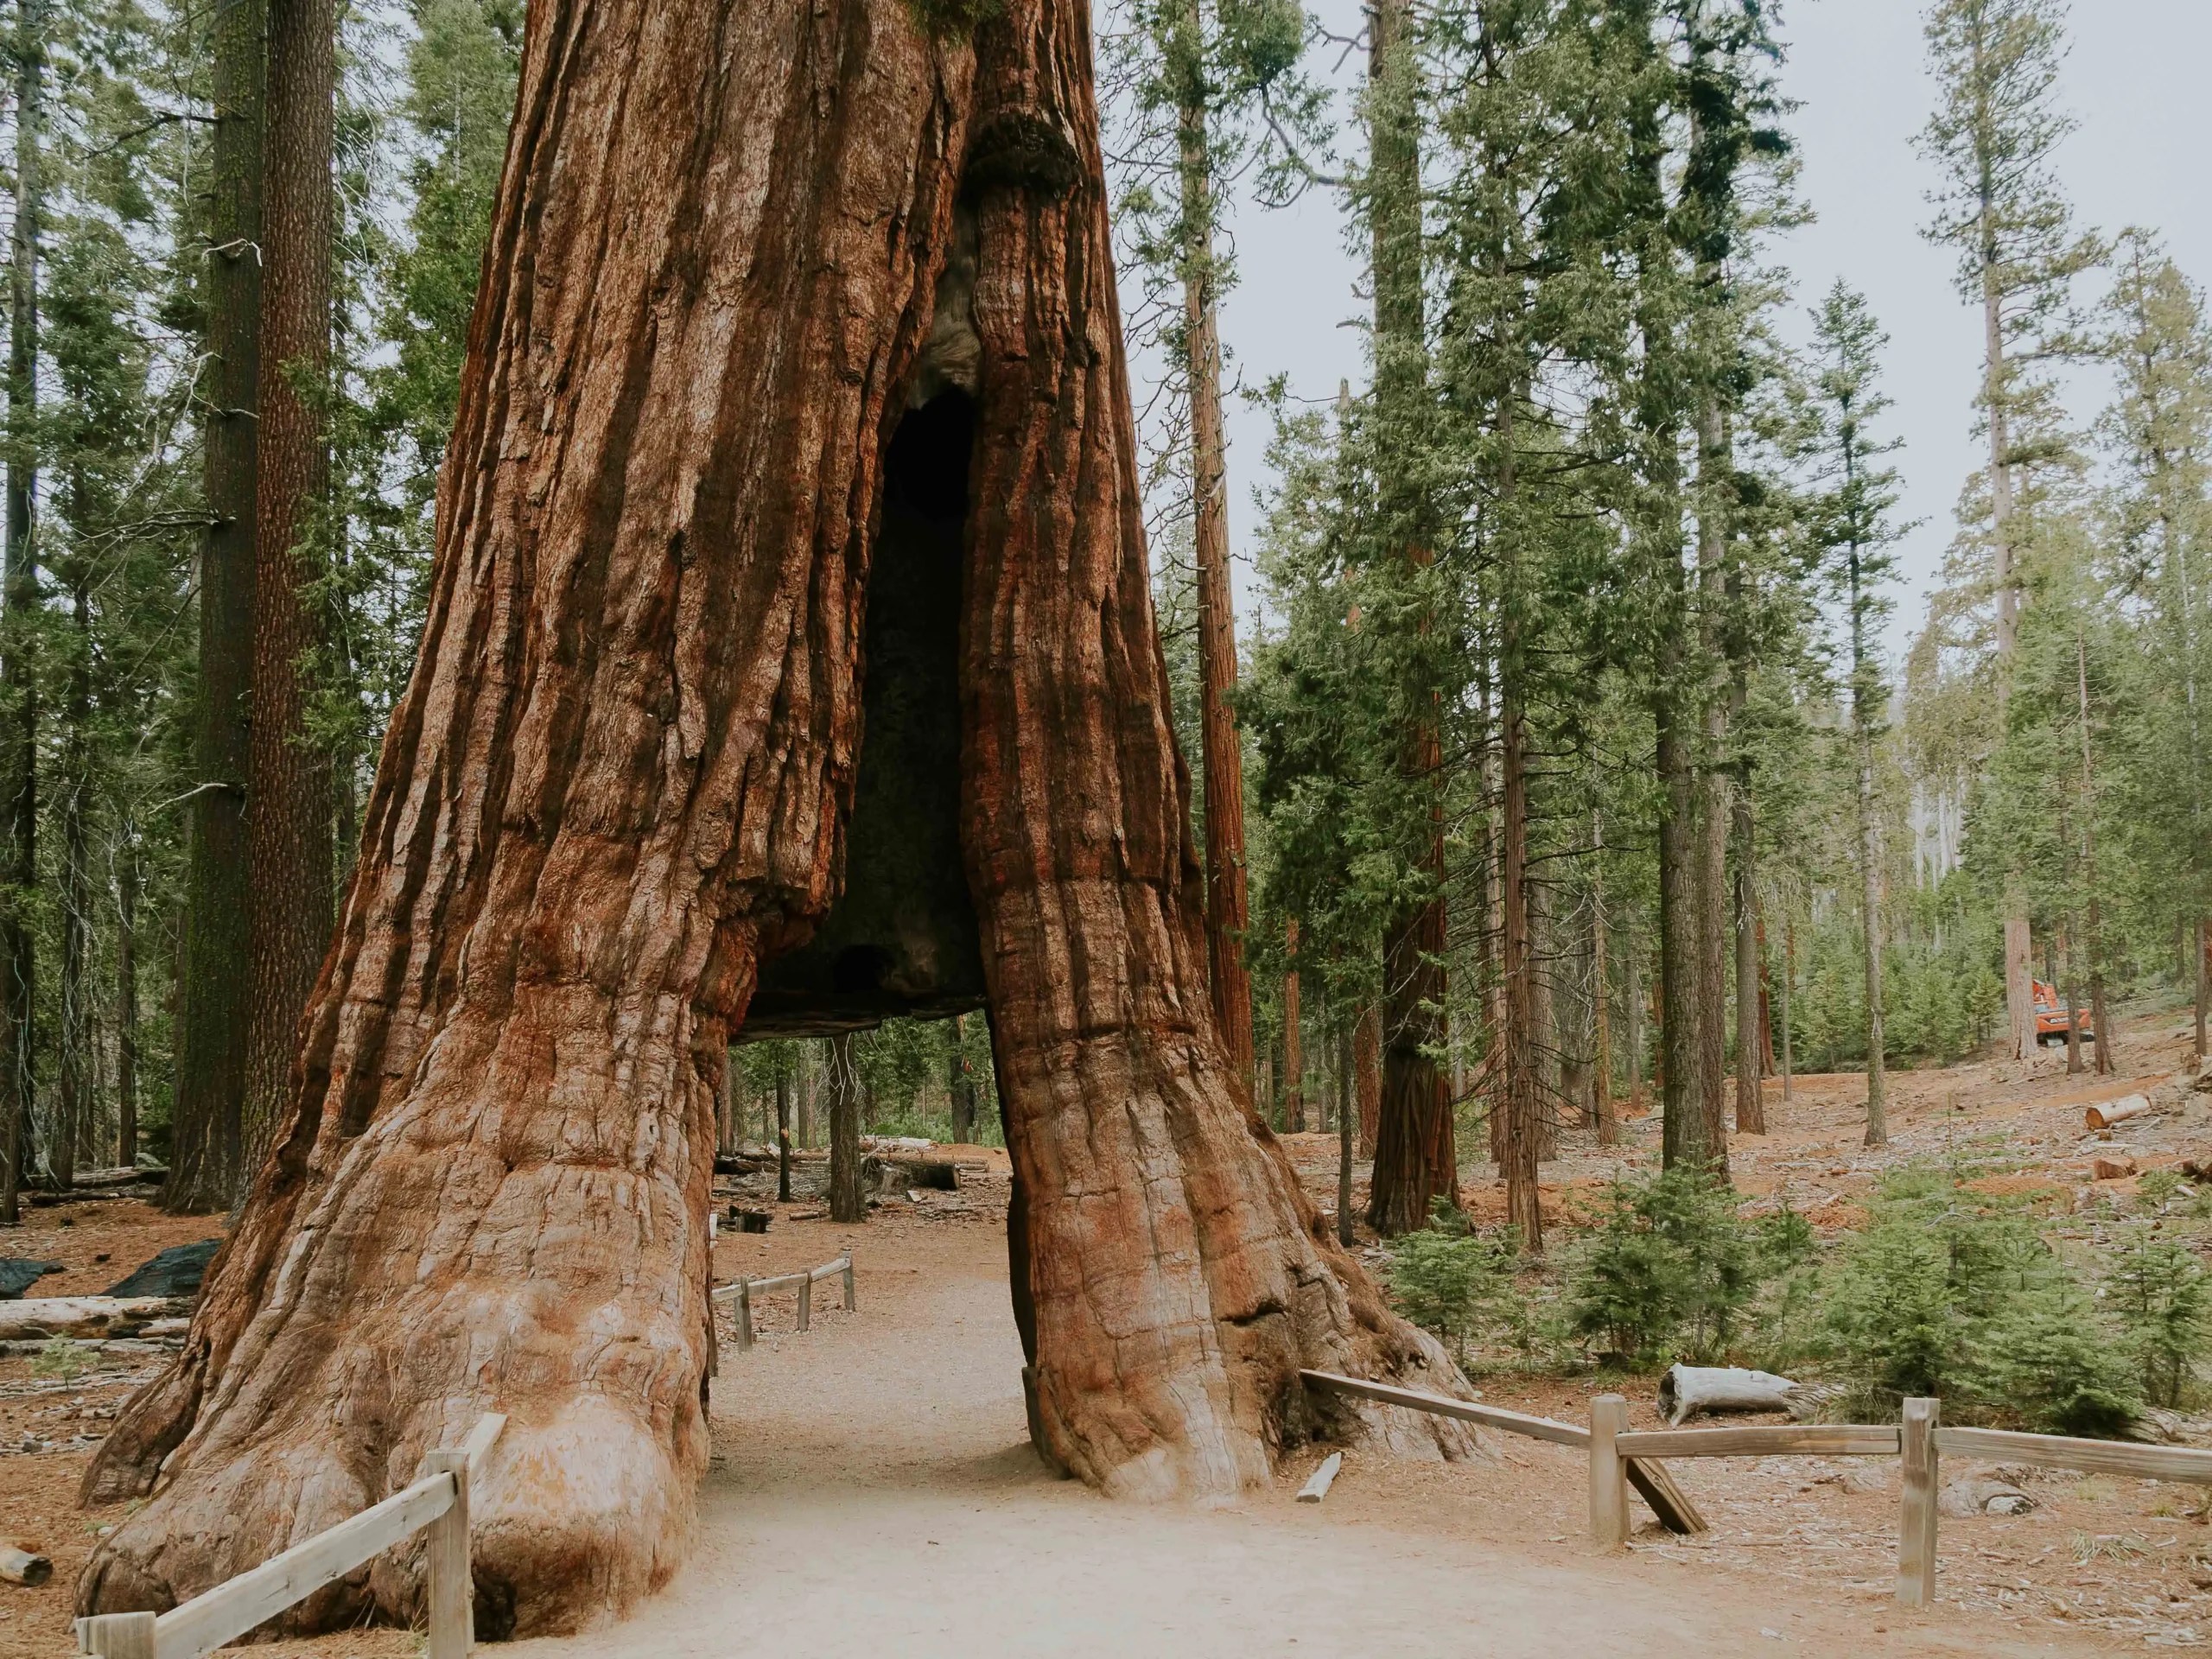
Mariposa Grove
Mariposa Grove is where you’ll find Yosemite’s giant sequoias. If you’ve never seen redwoods or sequoias before, it’s absolutely worth visiting — walking among trees that big is pretty special.
That said, in my personal opinion, if you’ve already been to Sequoia National Park or seen the coastal redwoods in Northern California, Mariposa Grove isn’t a must. It takes time to get out there, and I think that time is better spent hiking or exploring more of Yosemite Valley or the high country.
Tuolumne Meadows
If you’re visiting in late spring through early fall (when Tioga Road is open), Tuolumne Meadows is an amazing add-on. It feels totally different from the valley — more open, alpine, and quiet — and it’s great for hiking, photography, or just slowing down away from the crowds.
Getting Around Yosemite Valley
You can drive around Yosemite Valley, but during busy times parking can be frustrating — especially at popular scenic stops and trailheads. If you’re visiting during peak hours or peak season, it’s often easier to park once and rely on other ways of getting around.

Yosemite Valley Shuttle System (Free)
Yosemite has a free shuttle system that makes getting around the valley pretty easy, especially if you don’t want to deal with parking.
- Valleywide Shuttle
This route stops throughout Yosemite Valley, including lodges, food areas, campgrounds, and major trailheads. Shuttles typically run every 12–22 minutes from 7:00 a.m. to 10:00 p.m. - East Valley Shuttle
This route focuses on eastern Yosemite Valley, with stops at Yosemite Village, Curry Village, the Pines campgrounds, and nearby trailheads. Shuttles usually arrive every 8–12 minutes from 7:00 a.m. to 10:00 p.m.
The shuttle is especially helpful if you’re staying in the valley and want to move between photo spots, trailheads, and food areas without constantly relocating your car.
How Many Days Do You Need in Yosemite?
I stayed in Yosemite for about five days, and for the way I like to travel, it felt perfect. It gave me enough time to explore Yosemite Valley, do shorter hikes, revisit the same photo spots in different light, and still have slower moments built into each day.
That said, how many days you need really depends on what you want to prioritize.
1–2 Days: Quick Highlights Trip
If you only have a day or two, focus entirely on Yosemite Valley.
- Hit the main viewpoints (Tunnel View, Sentinel Bridge, Yosemite Valley View)
- Do one or two short hikes like Lower Yosemite Falls or Bridalveil Fall
- Catch sunrise or sunset if you can
This is great for first-timers or people passing through, but it’ll feel fast.
3–4 Days: A Well-Rounded Visit
This is the sweet spot for most people.
- Explore Yosemite Valley at a slower pace
- Add in a longer hike (Mist Trail, Yosemite Falls, or 4 mile hike)
- Visit Glacier Point or Taft Point if roads are open
- See the valley in both morning and evening light
With 3–4 days, you’ll feel like you’ve actually experienced Yosemite — not just checked off the highlights.
5 Days (My Experience): Ideal for Photography & Slow Travel
Five days was perfect for me as a photography-focused trip.
- Time to revisit the same spots in different lighting and weather
- Flexibility to wait out clouds, fog, or storms
- Room for rest, working remotely, and spontaneous detours
- Multiple sunrise and sunset sessions without feeling rushed
If photography, stargazing, or moving at a slower pace matters to you, I highly recommend staying this long.
6+ Days: Deep Exploration
If you have more time, this opens the door to exploring beyond Yosemite Valley:
- Tuolumne Meadows (when Tioga Road is open)
- Longer hikes like Clouds Rest or Half Dome
- Mariposa Grove (if it’s your first time seeing giant sequoias)
- More backcountry or high-country hikes
This is ideal if hiking is your main focus or you want to experience very different sides of the park in one trip.
Thoughts on Yosemite
Yosemite is one of those places where more time really does make a difference — especially if you care about light, weather, and being present instead of rushing. Even just adding one extra night can completely change how the park feels.
If you can, stay in the valley, wake up early at least once, and give yourself time to just sit in a meadow and watch the light move. That’s where Yosemite really shines.
Backpacking in Yosemite (For a Deeper Sierra Experience)
While this trip was focused on camping in Yosemite Valley, it’s worth mentioning that Yosemite is also one of the best backpacking destinations in the Sierra Nevada — and a major highlight for long-distance hikers.
Yosemite is home to a large portion of the John Muir Trail (JMT), one of the most iconic backpacking routes in the U.S. The trail runs through Yosemite’s high country, connecting alpine lakes, granite passes, and remote wilderness areas that feel completely different from the valley floor.
If you’re interested in backpacking in Yosemite, you’ll need permits and some advance planning, but the payoff is huge: fewer people, quieter landscapes, and some of the most stunning scenery in the Sierra Nevada.
I’ve spent a lot of time backpacking throughout the Sierras, including sections of the JMT and other multi-day routes. If you’re curious about what backpacking in this region is really like — gear, routes, and real trail experiences — you can read more of my Sierra backpacking trips here:
If you have the time, Yosemite makes an incredible jumping-off point for longer adventures deeper into the mountains.
- Florence Lake to Evolution Valley: 4 Magical Nights Backpacking the John Muir Trail – Part of the epic John Muir Trail that stretches from Yosemite to Mount Whitney.
- Bishop Pass from South Lake: 4 Day Backpacking Adventure – An iconic Sierra Nevada hiking trip with sweeping views, alpine lakes, and granite passes. Features Long Lake, Chocolate Lakes Loop and Dusy Basin.
- Treasure Lakes Trail: A 4-Day Backpacking Adventure in Bishop California – A quieter trail to hidden lakes perfect for solitude, photography, and fishing.
P.S. Like the vibe of these photos?
I’ve turned some of my favorite travel shots into art prints over on my Etsy shop! Not every place I write about makes it into the shop, but if you’re into dreamy landscapes, vintage surfers, or just love a cute puffin, come take a look: Night Star Studio on Etsy


1 comment
zoritoler imol
Fantastic web site. A lot of helpful information here. I am sending it to some buddies ans additionally sharing in delicious. And naturally, thank you to your sweat!
Comments are closed.