
Planning a Kearsarge Pass backpacking trip? This 3-night itinerary explores one of the most scenic trails in the Eastern Sierra, with overnight stops at Charlotte Lake and Kearsarge Lakes, an optional day hike to Rae Lakes, and plenty of practical tips for planning your adventure.
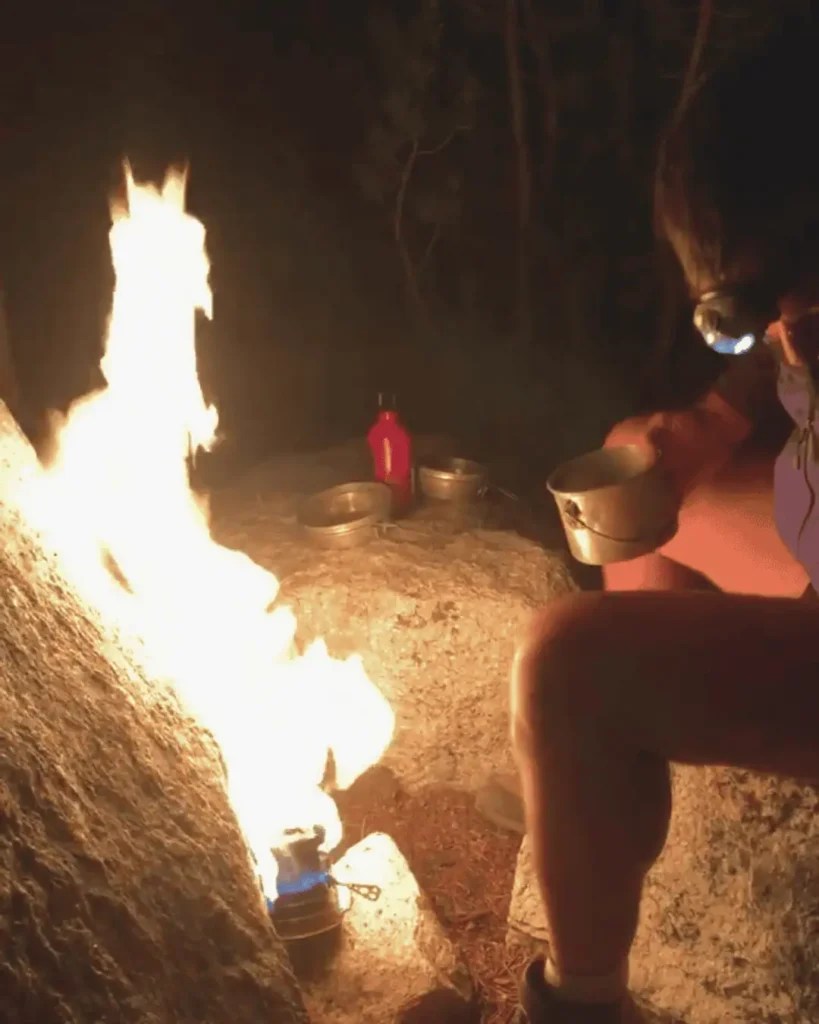
Ten years ago, Kearsarge Pass was my very first backpacking trip. We barely made it over the pass before setting up camp at Kearsarge Lakes for the remainder of the trip. The camp stove went up in flames the first night making it a backpacking adventure I’ll never forget (see below image). Despite the mishaps, I left with vivid memories of how incredible the scenery was.
A decade later, I finally returned—and it was every bit as beautiful as I remembered. This time, we had lighter gear, much more experience, and in significantly better shape, allowing us to explore beyond Kearsarge Lakes and spend a few days discovering more of this stunning corner of the Sierra Nevada.
Kearsarge Pass, located west of Independence (about 45 minutes north of Lone Pine), is one of the most popular trailheads in the Eastern Sierra. Not only is it a favorite destination for weekend backpackers, but it’s also a common resupply and entry point for hikers on both the John Muir Trail (JMT) and Pacific Crest Trail (PCT).
It’s also an alternate access point for the Rae Lakes Loop if permits from Road’s End in Kings Canyon are unavailable. While entering from Kearsarge Pass does make the loop longer—it remains a great backup option during the busy summer season. I’ll talk more about that later in this guide.
A Few Notes*
- Distances and elevations are approximate and were compiled from trail maps and Google. Always verify current trail conditions, mileage, and elevation using your own maps before heading into the backcountry.
- Hiking times vary widely depending on fitness, weather, pack weight, and how often you stop to enjoy the scenery. We’re probably on the average-to-slower side of backpackers, so use our times as a loose reference.
3-Night Itinerary at a Glance
- Day 0: Camp at Onion Valley Campground to acclimate.
- Day 1: Onion Valley Trailhead → Kearsarge Pass → Bullfrog Lake → Charlotte Lake (8 miles)
- Day 2: Day hike from Charlotte Lake → Glen Pass → Rae Lakes → Glen Pass → Charlotte Lake (8-10 miles)
- Day 3: Charlotte Lake → (Optional Vidette Meadow Detour) → Bullfrog Lake → Kearsarge Lakes (6 miles)
- Day 4: Kearsarge Lakes → Kearsarge Pass → Onion Valley Trailhead (6.5 miles)


Kearsarge Pass Trail Guide:
Day 0: Camping at Onion Valley the Night Before
We spent the night before our hike at Onion Valley Campground, something I’d highly recommend if you can get a campsite. Sitting at approximately 9,200 feet (2,804 m), it gives your body a chance to begin acclimating before tackling the climb the following morning. Even one night at elevation can make a noticeable difference.
An added bonus is that the campground sits directly next to the trailhead, allowing for an early start. During summer, the climb up Kearsarge Pass gets hot, and much of the trail is exposed with little shade. Starting early also means cooler temperatures, fewer afternoon thunderstorms, and a better chance of enjoying the summit before the crowds arrive.
We left the trailhead around 6:45 a.m. and reached the pass just before 11:00 a.m. The hike to Kearsarge Pass is approximately 4.8 miles (7.7 km) one way, gaining around 2,600 feet (790 m) of elevation before reaching the summit at 11,760 feet (3,585 m).
We’re definitely on the slower side, especially with full backpacks, but this is a climb that’s best enjoyed at your own pace. There are plenty of places to stop, catch your breath, and admire the scenery.
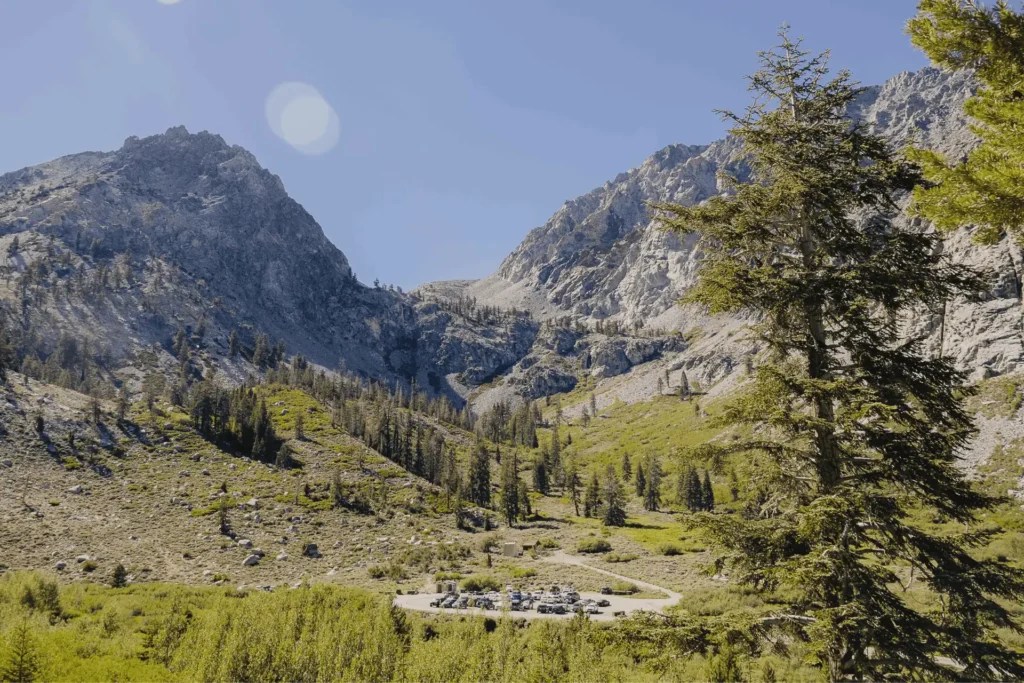


View of the Trailhead, Onion Valley Campground, Parking lot entrance to Trailhead
Day 1: The Hike to Kearsarge Pass
Trail Stats: Onion Valley to Charlotte Lake (via Kearsarge Pass)
- Distance: 8 miles (12.9 km) one way
- Elevation Gain: 2,600 ft (790 m)
- Highest Elevation: Kearsarge Pass – 11,760 ft (3,585 m)
- Ending Elevation: Charlotte Lake – 10,544 ft (3,214 m)
- Time: 6–8 hours with a full backpack
- Difficulty: Strenuous
- Permit Required: Inyo National Forest Wilderness Permit
- Dogs Allowed: Yes to Kearsarge Pass; no beyond the pass into Kings Canyon National Park
The trail wastes no time gaining elevation but rewards you almost immediately with beautiful alpine scenery. As you climb higher, you’ll pass several crystal-clear lakes, granite cliffs, waterfalls, and sweeping views back toward Onion Valley.
One of my favorite things about this hike is that the scenery continually changes. Every switchback reveals another lake tucked into the granite landscape, making the climb feel less repetitive than many long ascents.
The final stretch to Kearsarge Pass is the toughest. The trail becomes rockier, more exposed, and the thin air at nearly 12,000 feet is definitely noticeable. But once you finally reach the summit, every bit of effort feels worthwhile.
The panoramic views stretching across the Eastern Sierra and into Kings Canyon National Park are breathtaking. If it’s your first time hiking into the High Sierra from the east side, this viewpoint is an unforgettable introduction. Of all the Sierra passes I’ve hiked, Kearsarge remains one of the most scenic while also being one of the easiest to access. Many of the other iconic passes—such as Mather, Pinchot, or Forester Pass—require significantly longer backpacking trips to reach. If you’re looking for another incredible East Sierra pass hike, Bishop Pass is another one of my favorites.


Last stretch up Kearsarge pass, Big Pothole Lake and the top of Kearsarge Pass
Camping Before the Pass
If you don’t want to hike all the way over Kearsarge Pass on your first day, there are several camping options before reaching the summit. Little Pothole Lake, Gilbert Lake, and Flower Lake all have established campsites nestled among the trees.
These camps are especially nice if you’re backpacking with dogs, introducing someone to backpacking, or simply prefer a shorter first day. Just keep in mind that they’re located close to the main trail, so you’ll likely see plenty of hikers passing through during the day.
One important thing to note is that dogs are allowed on the Inyo National Forest side of Kearsarge Pass but are not permitted once you descend into Kings Canyon National Park on the western side of the pass.


Entrance of John Muir Wilderness and Little Pothole Lake
Kearsarge Pass to Charlotte Lake
After spending some time at the summit enjoying the views and a well-earned snack, we began our descent toward Kearsarge Lakes before continuing on to Charlotte Lake.
There are two trail options after the pass: a high route and a low route. Since we planned to return via the other trail a few days later, we decided to take the high route past Bullfrog Lake.
This ended up being one of my favorite sections of the trip. The elevated trail offers spectacular views looking down over Bullfrog Lake and the surrounding granite peaks. Ironically, despite its less-than-glamorous name, Bullfrog Lake may have been the prettiest lake we passed all day. Camping isn’t allowed here to help protect the fragile shoreline, but it’s well worth stopping for photos from one of the overlooks. The views from both above and lakeside are absolutely stunning.
From Bullfrog Lake, it’s another few miles of rolling terrain before reaching Charlotte Lake, which sits at 10,544 feet (3,214 m). The trail gradually descends into the basin, where campsites are scattered primarily along the middle and far end of the lake. There’s also a ranger station nearby.
While Charlotte Lake isn’t quite as dramatic as Kearsarge Lakes or Bullfrog Lake, it’s a peaceful place to spend a couple of nights. The campsites are well-spaced, there’s plenty of tree cover, and it’s an excellent base camp for exploring the surrounding area. We visited during the middle of the week, and it felt surprisingly quiet. By Friday afternoon, however, noticeably more backpackers began arriving for the weekend.
We spent our first two nights at Charlotte Lake before using it as a base camp for a day hike to Rae Lakes, which turned out to be one of the highlights of the entire trip.


Day 2: Day Hike to Rae Lakes from Charlotte Lake
Trail Stats: Charlotte Lake to Rae Lakes Out and Back
- Distance: 8-10 miles round trip (depending on route)
- Elevation Gain: 2,400–2,700 ft (including Glen Pass)
- Highest Elevation: Glen Pass – 11,926 ft (3,635 m)
- Time: 8–12 hours
- Difficulty: Strenuous
- Best For: Experienced hikers already camping at Charlotte Lake
We had been hearing about Rae Lakes for years. It’s one of the most famous backpacking destinations in the Sierra Nevada and is typically visited as part of the Rae Lakes Loop, a 3–5 day backpacking trip that usually begins at Road’s End in Kings Canyon National Park.
Earlier in the season, we had actually hiked part of the loop through Paradise Valley (you can read about that trip here). Unfortunately, the bridge connecting the loop is under repair, meaning hikers had to ford a thigh-high river to continue. Between the river crossing and the significant elevation gain required to complete the full loop, we decided to save it for another time.
So this time, we added Rae Lakes as a long day hike from our base camp at Charlotte Lake.
Taking the Charlotte Lake Connector Trail
Rather than backtracking on the main trail, we decided to take the unofficial connector trail that climbs from near the Charlotte Lake Ranger Station up to the John Muir Trail just below Glen Pass.
Yes, the trail does exist—but “trail” is a generous description.
It’s unofficial, occasionally disappears, and requires a bit of route-finding along with a few easy scrambles over granite slabs. At several points, you’ll wonder if you’ve gone the right way. We definitely did.
One thing that helped us was looking for the small white rock cairns marking portions of the route. They don’t appear everywhere, but they generally point you back in the right direction. Parts of the trail also appear on AllTrails, making it useful as a loose navigation aid.
Our biggest piece of advice? If the route suddenly feels too technical, stop and look around. Chances are there’s an easier way nearby. Most of the scrambling is fairly straightforward, but there are usually multiple ways through the granite.
Overall, I do think this connector saves time compared to hiking back around on the maintained trail, and it offers some unique views over the Charlotte Lake basin that most hikers don’t get to see.
That said, I’d only recommend it as a day hike. If you’re carrying a full backpack while thru-hiking, I’d probably stick to the official trail. The connector is considerably steeper, has loose footing in places, and requires much more balance than the maintained route. As always, use your own judgment and comfort level.


Climbing Glen Pass
Eventually the connector joins the John Muir Trail, where the climb to Glen Pass begins.
At 11,926 feet (3,635 m), Glen Pass is one of the highest mountain passes on the John Muir Trail, and climbing it from the Charlottle Lake side is hard. This is one of the main reasons hikers generally recommend completing the Rae Lakes Loop clockwise starting at Woods Creek —you climb the gentler western side and descend the steeper eastern side.
After already climbing up from Charlotte Lake, tackling the switchbacks to Glen Pass definitely felt like a grind. But as with most Sierra passes, the reward comes at the top.
From the summit, you get incredible panoramic views looking back toward Charlotte Lake as well as down toward Rae Lakes, with rugged granite peaks stretching in every direction.
Honestly, if you’re looking for an easier day hike, I’d even consider making Glen Pass your turnaround point.
The views from the pass alone are spectacular and, looking back, it’s probably where I would have ended the hike if I were doing this trip again.
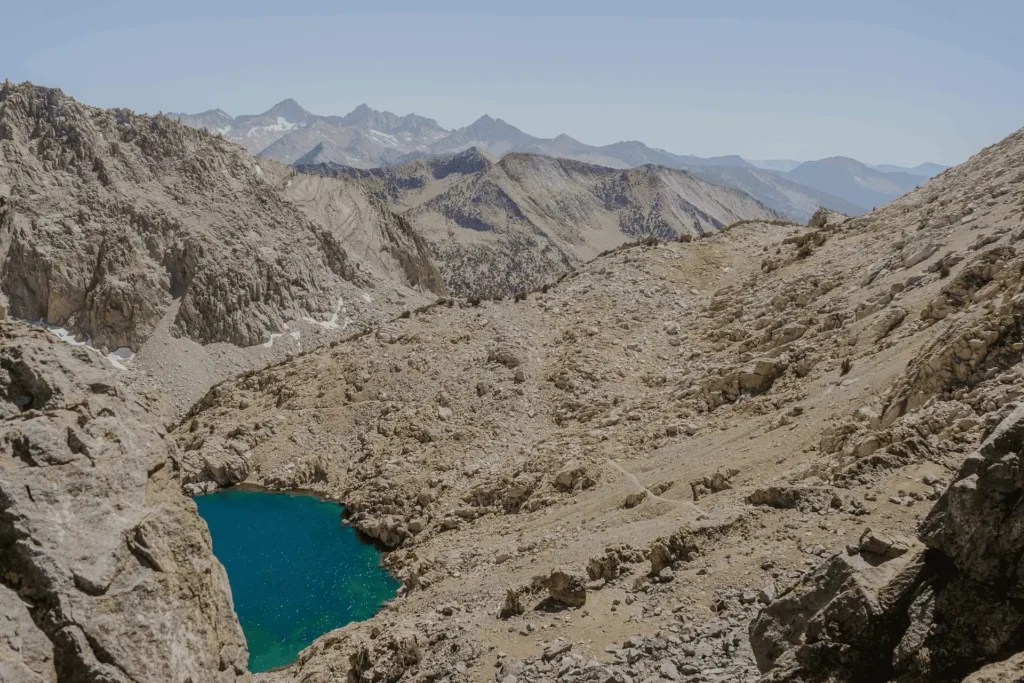


View looking towards Charlotte Lake, Hiking up Glen Pass, Trail down to Rae Lakes
Visiting Rae Lakes – 10,544 feet (3,214 meters)
But of course, we couldn’t come this far without finally seeing Rae Lakes for ourselves.
From Glen Pass, it’s roughly 4 miles round trip with about 1,300 feet (400 m) of elevation loss and regain, meaning whatever you descend on the way to the lakes you’ll have to climb back up before returning to Charlotte Lake.
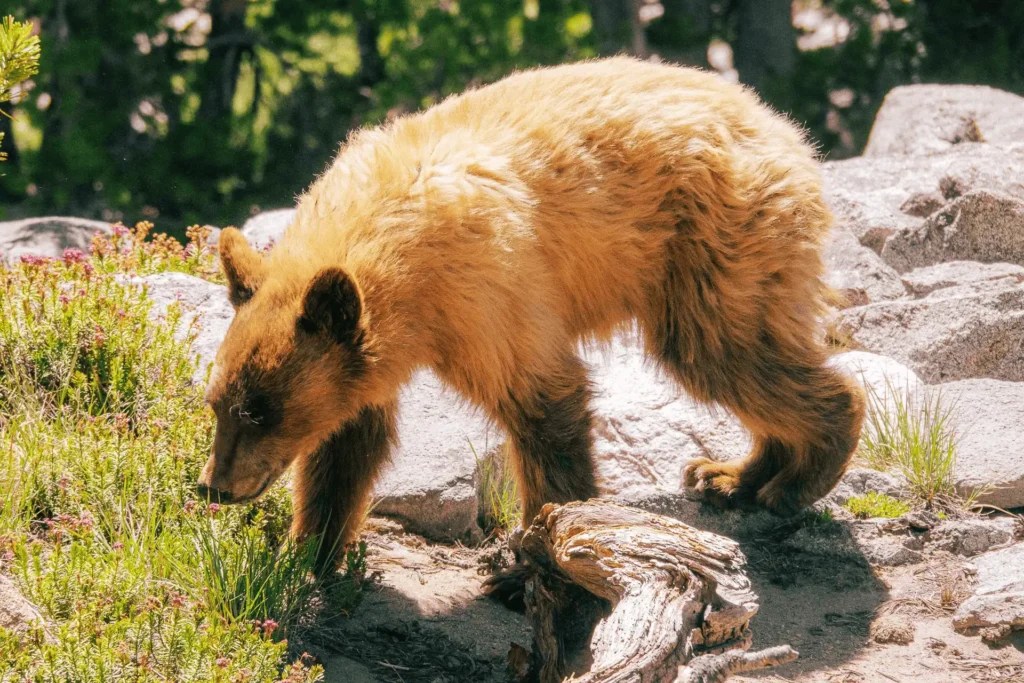
The descent is beautiful, and partway down we were lucky enough to spot a black bear wandering through the basin—definitely one of the highlights of the day.
Once we reached Rae Lakes, we spent about two hours eating lunch, relaxing by the shoreline, and wandering around taking photos.
There’s no denying that Rae Lakes are stunning. The crystal-clear water backed by the jagged Painted Lady peaks creates one of the most iconic alpine landscapes in California. In early and mid-summer, the surrounding meadows are also filled with colorful wildflowers, making it especially photogenic.
That said, this is where my opinion differs from many others.
If you’ve spent a lot of time backpacking throughout the Eastern Sierra, you’ve probably seen no shortage of spectacular alpine lakes. While Rae Lakes are beautiful, they didn’t feel dramatically different from many of the other lakes we’ve visited over the years. Personally, I actually preferred both Bullfrog Lake and Kearsarge Lakes.
After climbing Glen Pass twice, I found myself appreciating the views from the pass more than the destination itself. If I were planning this trip again, I would likely hike to Glen Pass, soak in the incredible panorama, and then head back to Charlotte Lake.
Of course, if Rae Lakes has been on your bucket list—or you’re already backpacking the full Rae Lakes Loop—it’s absolutely worth visiting. But if you’re deciding whether to add the extra miles as a day hike, it’s helpful to know what you’re signing up for. Doing Glen Pass twice in one day is brutal.


Expect Crowds
One thing that immediately stood out was just how busy Rae Lakes was.
Compared to the peaceful atmosphere around Charlotte Lake, Rae Lakes felt bustling with backpackers arriving throughout the afternoon. Since it’s one of the most popular overnight destinations in Kings Canyon, campsites begin filling early, especially on weekends.
If you’re planning to camp here, it’s worth arriving earlier in the day to give yourself the best chance of finding a good site. We passed dozens of backpackers hiking in as we were leaving and couldn’t help feeling thankful to be returning to our quieter campsite at Charlotte Lake.
Bear Safety Around Rae Lakes Loop


Because this area sees thousands of backpackers every summer, it’s also one of the most active bear habitats in the Sierra Nevada.
The bears here have become incredibly accustomed to people. They’ve learned that hikers often mean food and have become skilled at stealing unattended backpacks or taking advantage of careless food storage.
During our hike, we encountered a black bear that barely seemed concerned by our presence. After talking with the ranger, we learned it was a well-known “problem bear” that had repeatedly obtained food from hikers and was at risk of eventually being euthanized if the behavior continues and he becomes more aggressive toward humans while looking for food.
It was a sobering reminder that bear safety isn’t just about protecting your own food—it’s about protecting the bears as well.
Always carry and properly use a bear canister, never leave food or scented items unattended (even for a few minutes), and never feed or intentionally approach wildlife. If a bear approaches your campsite or backpack, make noise, stand your ground, and work to scare it away from your food. Allowing bears to successfully obtain human food only reinforces the behavior, making future encounters more dangerous for both hikers and the bears themselves.
With responsible food storage and respectful wildlife practices, we can help keep these incredible animals wild and ensure they remain part of the Sierra landscape for generations to come.
Day 3: Charlotte Lake to Kearsarge Lakes (with an Optional Vidette Meadow Detour)
Trail Stats: Charlotte Lake to Kearsarge Lakes (+ Vidette Meadow)
- Distance: 4-6 miles (6.5-10 km), depending on the Vidette Meadow detour and campsite location
- Elevation Gain: 1,400–1,800 ft (425–550 m)
- Elevation Loss: 1,000–1,400 ft (305–425 m), including the Vidette Meadow descent
- Highest Elevation: Junction near Bullfrog Lake – 11,300 feet (3,444 m)
- Ending Elevation: Kearsarge Lakes – 10,900 ft (3,322 m)
- Time: 5–7 hours (plus time spent exploring and breaks)
- Difficulty: Moderate to Strenuous (the Vidette Meadow detour adds a STEEP climb)
- Water: Frequent streams and lakes (water filter required)
After the long day hiking to Rae Lakes, we gave ourselves a slower morning. Instead of rushing out, we packed up camp at a relaxed pace before making our way back toward the main trail.
Not long after leaving Charlotte Lake, we reached the junction where the trail splits toward Bullfrog Lake or Vidette Meadow. Since today’s mileage was much shorter than the previous day, we decided to take advantage of the extra time and explore a little more.


Junction from Charlotte lake to main trail, view of the mountains from the top of the trail going down to Vidette Meadow
Optional Detour: Vidette Meadow
Vidette Meadow sits along both the John Muir Trail and Pacific Crest Trail, making it a fun opportunity to briefly step onto two of America’s most famous long-distance trails.
To make the detour easier, we left our backpacks, bear canister, and most of our gear at one of the established campsites near the junction—a popular spot where many backpackers stop for lunch, reorganize their packs, or take a break before continuing over Kearsarge Pass.
From there, we hiked down toward the meadow carrying only water, snacks and our cameras.
Be prepared—the trail down is steep.
It’s nearly a mile of continuous switchbacks descending toward Kings Canyon, and of course, everything you hike down you’ll have to climb back up.
The first section of the descent was actually my favorite part. Looking out across Kings Canyon from the switchbacks was absolutely beautiful. About halfway down, we reached a creek flowing through a lush area filled with wildflowers and a few campsites. If you’re looking for a place to refill water, cool off, or simply take a break, I’d highly recommend stopping here. It’s also a good stopping point to turn back if you’re not invested in seeing the meadow and just want the mountain views.
One thing we started doing throughout the trip was soaking our hats, neck gaiters, and sun sleeves in every cold stream we crossed. It made a huge difference during the hottest parts of the afternoon and quickly became one of our favorite trail tricks.


Vidette Meadow, flowers by the stream mid way down
As for Vidette Meadow itself…
I’d say your mileage may vary.
The meadow is pleasant and peaceful, but it’s relatively small and mostly surrounded by forest. If you’ve already visited a few alpine meadows in the Sierra, you probably won’t feel like you’re missing anything by skipping the final descent.
I actually enjoyed the views from the switchbacks and creek more than the meadow itself. We hiked all the way down—and all the way back up—mostly because we’d already come that far. Similar to Raes Lake, if I were doing the trip again, I would stop halfway, enjoy the creek, and turn around there.
*Warning: creeks and any body of water tend to have more mosquitoes around them, but this year (2026) it hasn’t been that bad*
Bullfrog Lake
Back at the junction, we enjoyed lunch, repacked our backpacks, and continued toward Kearsarge Lakes.
This time we chose the lower trail along Bullfrog Lake instead of the higher route we’d taken on the way in.
I’m so glad we did.
Even after seeing Rae Lakes the day before, I still think Bullfrog Lake was one of the prettiest lakes of the entire trip. The turquoise water, granite shoreline, and surrounding peaks create an incredible setting, and because camping isn’t allowed here, the shoreline remains remarkably pristine.
If you’re backpacking through this area, don’t rush past Bullfrog Lake. Take your time, walk along the shoreline, and soak in the views. It’s one of those places that’s worth lingering a little longer.


Camping at Kearsarge Lakes
From Bullfrog Lake, it was an easy walk over to Kearsarge Lakes.
By this point, the afternoon sun had caught up with us, and after a few days of hiking, we were ready to call it a day. We grabbed one of the available campsites near the first lake and set up camp.
The campsite worked well, especially knowing we’d have a shorter hike back to the trailhead the following morning.
That said, if I were planning this trip again, I would hike farther into the basin before stopping.
The lake trail continues well beyond what most maps—including Google Maps—show. There are several more campsites extending back along the far side of the lake
If you have the energy and don’t mind adding a little extra mileage to your hike out, I’d absolutely recommend camping near the last lake. Waking up beneath the towering granite pinnacles would be well worth it.
Like Rae Lakes, Kearsarge Lakes is an incredibly popular camping area, especially on summer weekends. Campsites begin filling throughout the afternoon as backpackers come over the pass from both directions, so arriving earlier gives you the best chance of finding a prime spot. It’s also a popular spot for fishing!


Evenings on the Trail
One of my favorite parts of backpacking isn’t just the scenery—it’s the people you meet along the way.
That evening we spent hours chatting with hikers tackling the Pacific Crest Trail, the John Muir Trail, and others out on weekend adventures like ours.
Conversations in the backcountry are refreshingly simple.
Nobody asks what you do for work or where you live. Instead, people ask where you’ve hiked, where you’re headed next, trail conditions, favorite campsites, or how many days of food you have left.
For a little while, it feels like the rest of the world disappears.
You’re all just part of the same tiny trail community, sharing stories before heading off in different directions the next morning.
That evening, I wandered over to the Kearsarge Pinnacles to watch the sunset, and woke up early the next morning to watch the sunrise from the same spot.
Looking back, those quiet moments may have been my favorite part of the entire trip.
Sometimes the best memories aren’t reaching another destination—they’re sitting on a sun-warmed rock, watching the light change across the mountains, and knowing there’s nowhere else you’d rather be.
Day 4: Kearsarge Lakes to Onion Valley Trailhead
Trail Stats: Kearsarge Lakes to Onion Valley Trailhead
- Distance: ~6.5 miles (10.5 km)
- Elevation Gain: ~850–900 ft (260–275 m) to Kearsarge Pass
- Elevation Loss: ~2,600 ft (790 m) to Onion Valley Trailhead
- Highest Elevation: Kearsarge Pass – 11,760 ft (3,585 m)
- Time: 4–5 hours
- Difficulty: Moderate (the climb back to the pass is short but steady before a long descent)
- Water: Several lakes and streams along the route (filter required)
- Best For: A scenic final morning with one last High Sierra sunrise before heading home.


On our final morning, I woke up early for one last sunrise walk beneath the Kearsarge Pinnacles.
Watching the first light hit the granite peaks was the perfect way to end the trip. The basin was quiet, the lakes were glassy, and for a little while it felt like I had the entire place to myself.
After packing up camp, we started the short climb back toward Kearsarge Pass. From Kearsarge Lakes, it’s about 2 miles with roughly 850–900 feet of elevation gain, and we reached the summit in just over an hour.
We took one final break at the pass, soaking in the views we’d worked so hard to reach a few days earlier. Like many Sierra passes, it’s one of those places that’s difficult to leave. We spent a while chatting with other hikers making their way in for weekend trips before finally beginning the descent back toward Onion Valley.
Surprisingly, the hike down took almost as long as our climb up.
The combination of the afternoon heat, dusty trail, and tired legs definitely caught up with us. Even though it was almost entirely downhill, the descent took us around 3½ hours. Fortunately, there are plenty of excuses to stop along the way. We paused at several of the alpine lakes we’d hurried past on the first day, taking in the last of the High Sierra scenery before returning to the trailhead.
One of the highlights of the descent was running into a mule train heading up the trail. We stopped to chat with the wrangler, learned a little about the pack mules that supply the remote ranger stations throughout Kings Canyon, and even got to pet one before they continued on their way.
There’s actually a pack station right next to the Onion Valley trailhead, and during the summer it’s common to see mule trains transporting supplies into the backcountry.
Before long, we arrived back at Onion Valley, loaded up the car, and began the drive home.
Originally, we’d planned to celebrate with lunch in Lone Pine, but every restaurant in town seemed packed with hikers finishing their own adventures or passing through. Instead, we kept driving. If you’re heading back toward Los Angeles, our tradition is usually to stop at Coso Junction for a Subway sandwich, snacks, and one final stretch before the long drive home.
Planning Your Trip
Wilderness Permits
An Inyo National Forest Wilderness Permit is required for all overnight trips starting from the Kearsarge Pass (Onion Valley) trailhead.
Permits are reserved through Recreation.gov and can be competitive during the summer months.
- 60% of permits are released 6 months in advance on a rolling basis.
- The remaining 40% are released 2 weeks before your entry date.
- Both permit releases go live at 7:00 a.m. Pacific Time, and popular summer weekends can sell out within minutes. If you’re hiking during peak season, I’d recommend logging in a few minutes early and being ready right when reservations open.
This was actually one of the few trips where a ranger checked our permit while we were backpacking. We had a PDF saved on our phone, but the ranger mentioned that some wilderness rangers don’t accept digital copies. To avoid any issues, it’s best to print your permit before your trip and keep a paper copy with you. Recreation.gov also allows you to print your permit at home before your trip, so it’s an easy step that can save you a headache later.
Camping at Onion Valley Campground
If you can, I highly recommend spending the night before your hike at Onion Valley Campground.
Not only does camping at 9,200 feet help your body begin acclimating to the elevation, but the campground sits just minutes from the trailhead, making it easy to get an early start before the afternoon heat.
Reservations can also be made through Recreation.gov. The campground is small and fills up quickly during the summer, so it’s worth booking as early as possible.
One thing that surprised us was how primitive the campground is. During our stay, we couldn’t find any running water, so make sure you arrive with enough water or a way to filter from nearby sources if available. The campground has vault (pit) toilets, bear-proof food lockers, and spacious campsites, but don’t expect many amenities.
Final Thoughts
Returning to Kearsarge Pass ten years after my first backpacking trip felt incredibly special.
Back then, simply making it over the pass felt like a huge accomplishment. This time, with better gear, more experience, and stronger legs, we were able to slow down and explore the surrounding area in a way we couldn’t before.
Looking back, my favorite moments weren’t necessarily checking destinations off a list.
They were the quiet ones.
Watching sunrise beneath the Kearsarge Pinnacles.
Cooling off in icy mountain streams.
Relaxing beside Bullfrog Lake.
Talking with strangers who, for a few days, became part of the same trail community.
Kearsarge Pass is one of the most accessible ways to experience the High Sierra, and whether you’re planning your very first backpacking trip or returning years later like I did, it’s a place that’s easy to fall in love with.
If I were planning this itinerary again, I would still choose Charlotte Lake as a base camp, spend plenty of time exploring Bullfrog Lake and Kearsarge Lakes, and maybe stop at Glen Pass instead of hiking all the way to Rae Lakes. But that’s part of the fun—every trip teaches you something new and gives you another excuse to come back.
The Sierra has a way of doing that.
Every trail leaves you wondering what lies beyond the next pass.
More Sierra Nevada Backpacking Guides
Looking for more backpacking inspiration? I’ve also written guides covering other Sierra Nevada adventures, including multi-day backpacking trips, scenic lake basins, mountain passes, and some of my favorite trails throughout the range.
- Treasure Lakes Trail: A 4-Day Backpacking Adventure in Bishop California
- Florence Lake to Evolution Valley: 4 Magical Nights Backpacking the John Muir Trail
- 3 Epic Nights Backpacking Sabrina Basin Trail – Lake Sabrina to Hungry Packer
- Bishop Pass from South Lake: 4 Day Backpacking Adventure
- Camping in Yosemite Valley: Fall & Winter Guide, Best Hikes, Photography Spots & Tips
- Kings Canyon National Park Itinerary: 5 Nights Camping in Cedar Grove & Backpacking Paradise Valley


Whether you’re planning your first overnight trip or working through your Sierra Nevada backpacking bucket list, I hope these guides help you discover a few new places to explore.
Happy trails! 🏔️🥾
P.S. Like the vibe of these photos?
I’ve turned some of my favorite travel shots into art prints over on my Etsy shop! Not every place I write about makes it into the shop, but if you’re into dreamy landscapes, vintage surfers, or just love a cute puffin, come take a look: Night Star Studio on Etsy


